

Wondering why XDefiant won’t launch on PC? There’s a quick and effective solution!
If XDefiant has failed to launch after numerous unsuccessful attempts and rebooting your PC simply didn’t work, the issue could be game files or firewall-related.
This guide will clear the confusion around the unknown crashing of XDefiant and provide reliable troubleshooting solutions!
METHODS:
- Repair XDefiant’s Files in Ubisoft Connect
- Run Ubisoft & XDefiant As Administrator
- Optimize XDefiant’s .exe Launcher File
- Change Ubisoft Connect’s Activity Status
- Update Your Ubisoft Connect’s Version
- Allow XDefiant Through the Firewall
- Update the Visual C++ Redistributables
- Unintall & Install XDefiant On your PC
- Move XDefiant to a Different PC Drive
If XDefiant won’t start on your PC, run Ubisoft Connect as an administrator, launch XDefiant in compatibility mode, and repair the game’s files. If the issue persists, update your system’s Visual C++ redistributables and cleanly reinstall XDefiant.
Why is XDefiant Not Launching On PC?
Let’s review all possible causes why XDefiant is refusing to launch on your PC:
- Some of XDefiant’s files are missing or the directory is corrupted.
- XDefiant’s launcher has not been provided with administrator access.
- There’s an issue with Ubisoft Connect’s launcher installed on your PC.
- There’s an interference with the selected activity status in your account.
- XDefiant has not been allowed through the Windows firewall of the PC.
XDefiant Won’t Launch On PC - Complete Guide!
Notice: Have you checked if there’s a background process of XDefiant already running?
1. Repair XDefiant’s Files in Ubisoft Connect
Method 1/9
The first step is to repair XDefiant’s system files through Ubisoft Connect on your PC. The game’s directory might have been corrupted after a failed update or modifications of the default files, causing the launching issues or the repeated crashing midgame.
Here’s how to repair the system files of XDefiant on your PC:
- Launch Ubisoft Connect and go to “Library” (controller icon.)
- Click on the three dots next to XDefiant’s banner for options.
- Click on “Verify files” from the menu and confirm the admin prompt.
- Wait until XDefiant’s system files have been repaired and test-launch.

The file check typically lasts between 1 and 2 minutes based on the HDD or SSD’s performance and workload capacity. Ubisoft will automatically repair XDefiant’s game files if any issues are detected during the verification.
Tip: You can also initiate the file check by going to “Properties” → “Installation” → “Verify files.”
2. Run Ubisoft and XDefiant As Administrator
Method 2/9
Perhaps, XDifiant is missing administrator access and that’s the reason why it’s refusing the launch. So, the next step is to provide Ubisoft Connect with administrator privilege and then launch XDefiant through its installation directory and not Ubisoft’s library.
Follow these steps to run Ubisoft Connect and XDefiant as administrator:
- Open the task manager and end Ubisoft Connect’s task.
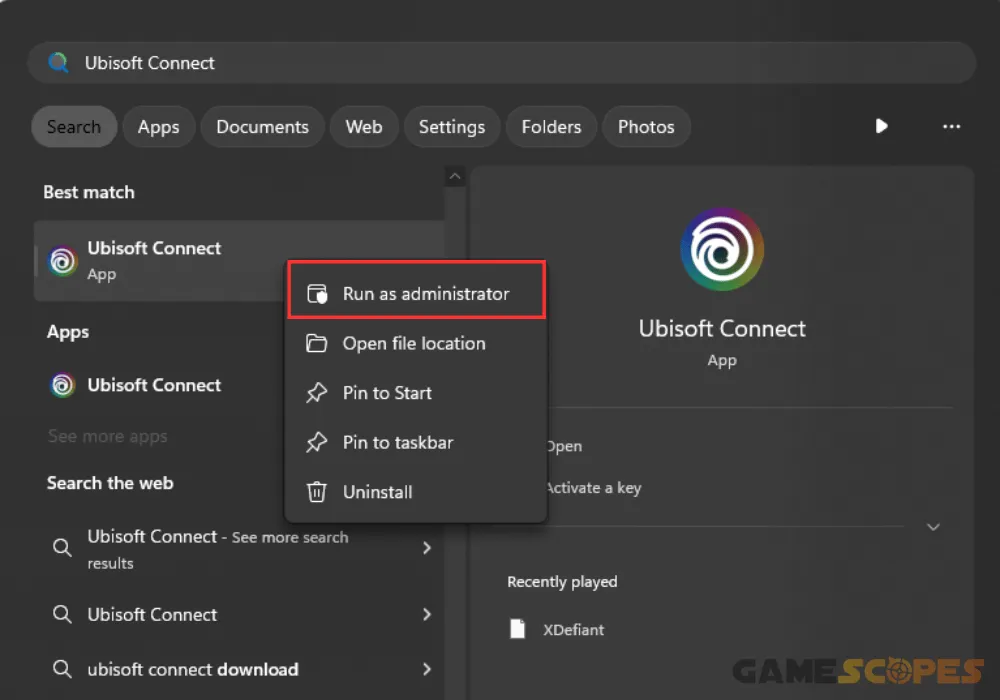
- Open the start menu and type “Ubisoft Connect” in the field.
- Right-click on the launcher and press “Run as administrator.”
- Wait until Ubisoft Connect loads up and navigate to “Library.”
- Click the three dots next to XDefiant’s banner within the menu.
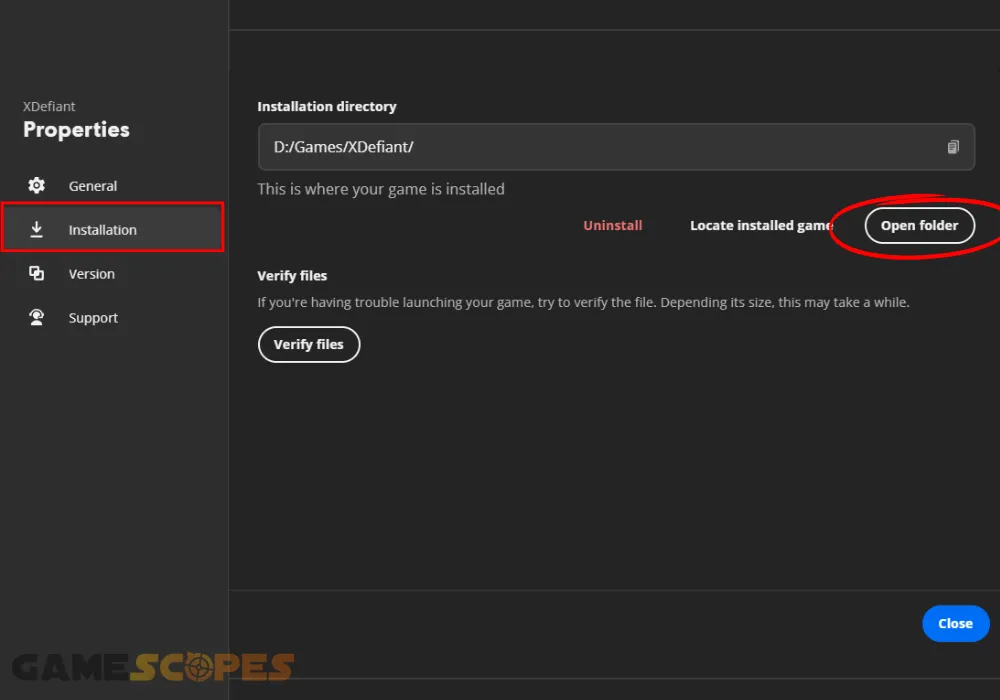
- Next, click “Properties” and navigate to the “Installation” section.
- Click “Open folder” in the menu to access XDefiant’s directory.
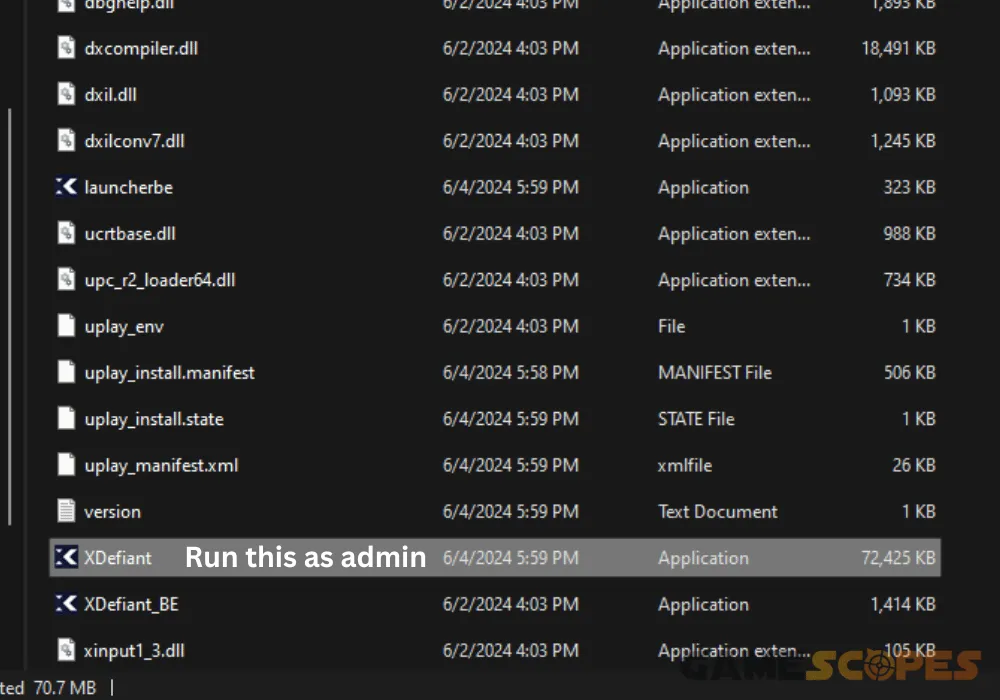
- Scroll down and locate the “XDefiant” executable file within the list.
- Then, right-click on the application and select “Run as administrator.”
If the game runs successfully, don’t forget to launch Ubisoft Connect and XDefiant with administrator privileges from now on.
3. Optimize XDefiant’s .exe Launcher File
Method 3/9
You can conduct a series of optimizations for XDefiant’s executable file to eliminate compatibility issues and any interference with your system. Your system may not have detected XDefiant’s .exe file properly, which could lead to repeated crashes, launching, or connection issues.
Follow these instructions to optimize the launcher file of XDefiant:
- First, launch Ubisoft Connect and navigate to the “Library” page.
- Then, click the three dots next to XDefiant and go to “Properties.”
- Go to the “Installation” page and click “Open Folder” on the side.
- Scroll down and locate the “XDefiant” executable file at the bottom.
- Right-click the file and select “Properties” from the drop-down menu.
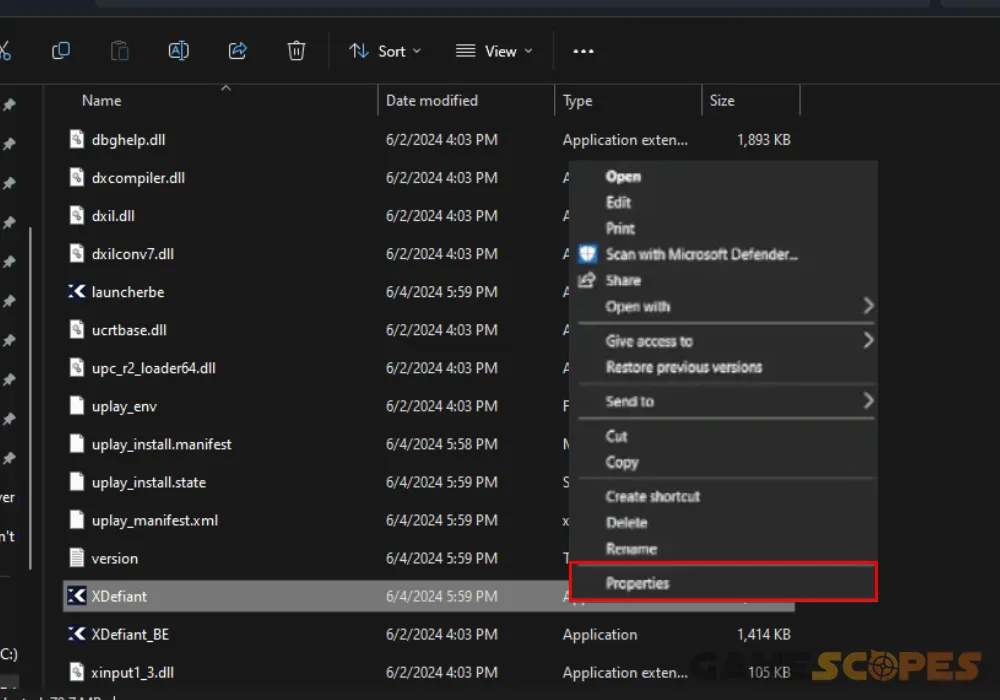
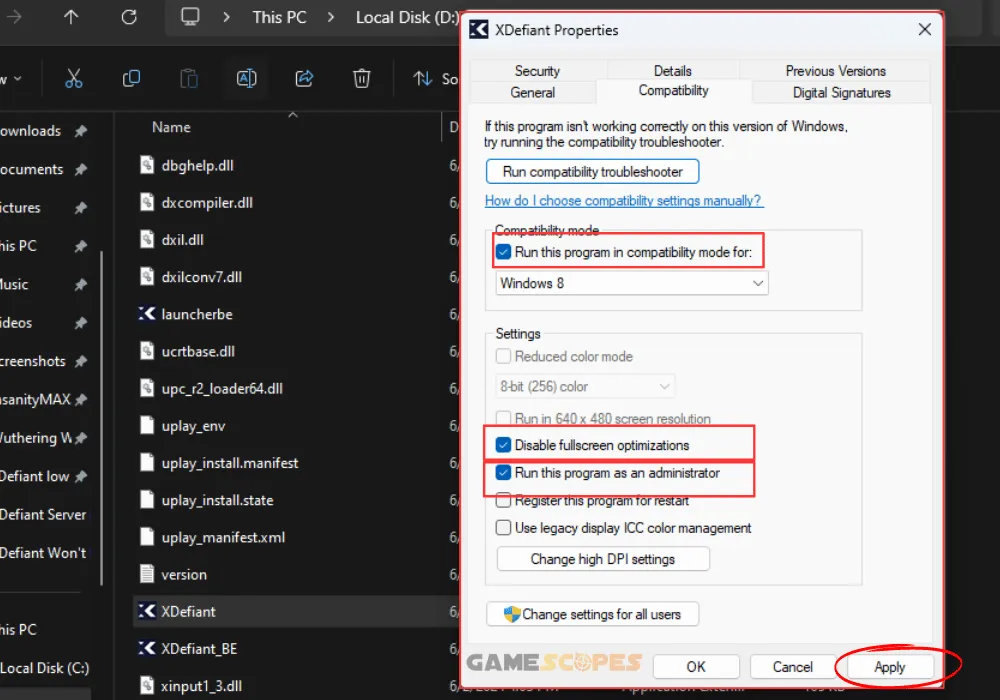
- Next, navigate to “Compatibility” from the upper navigational menu.
- Check the following:
✅“Run this program in compatibility mode for:” and test on Windows 8.
✅“Disable fullscreen optimizations” under the resolution header.
✅“Run this program as an administrator” under the fullscreen optimization.
- Click “Apply” and exit the configuration menu of XDefiant’s launcher file.
XDefiant will now always have administrator access to your system, even if you haven’t manually launched it as an administrator.
4. Change Ubisoft Connect Activity Status
Method 4/9
You may be prevented from accessing content through Ubisoft Connect for as long as the launcher is set to “Offline” through the activity settings. You may be periodically receiving server or connecting errors and even fail to sign in with your Ubisoft user account.
Here’s how to change the activity status of your Ubisoft Connect account:
- Hover over your profile icon at the upper-left corner of the screen.
- Click “Profile” from the drop-down menu to access the settings.
- Click the status badge on the right of your account’s profile icon.
- Choose “Online” from the available functions and save the changes.
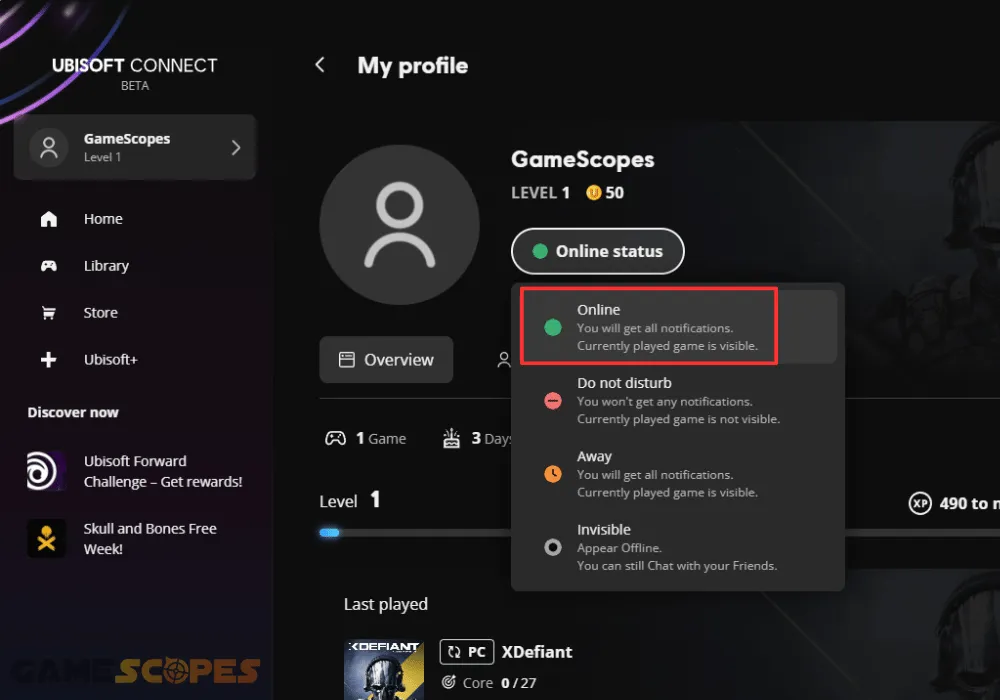
Keep in mind that the status of your account adjusts by itself whenever you’re away or online. You can manually pick “Online,” “Do not disturb,” “Away” or “Invisible” status from the profile menu to prevent it from changing automatically.
5. Update Your Ubisoft Connect’s Version
Method 5/9
An outdated version of the Ubisoft Connect app on your PC can also be a reason for repeated launching failures of any installed Ubisoft game. That’s why the next step is to update the Connect launcher to the most current firmware version.
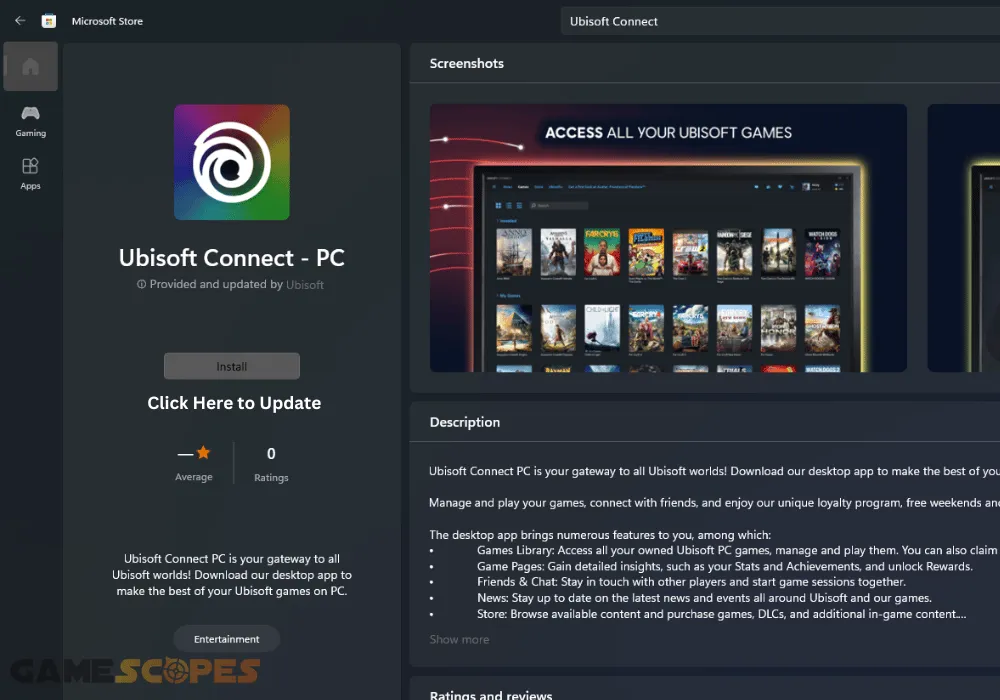
You can update the version of Ubisoft Connect manually through the Microsoft Store or re-download the latest version through the official download link hosted by Microsoft.
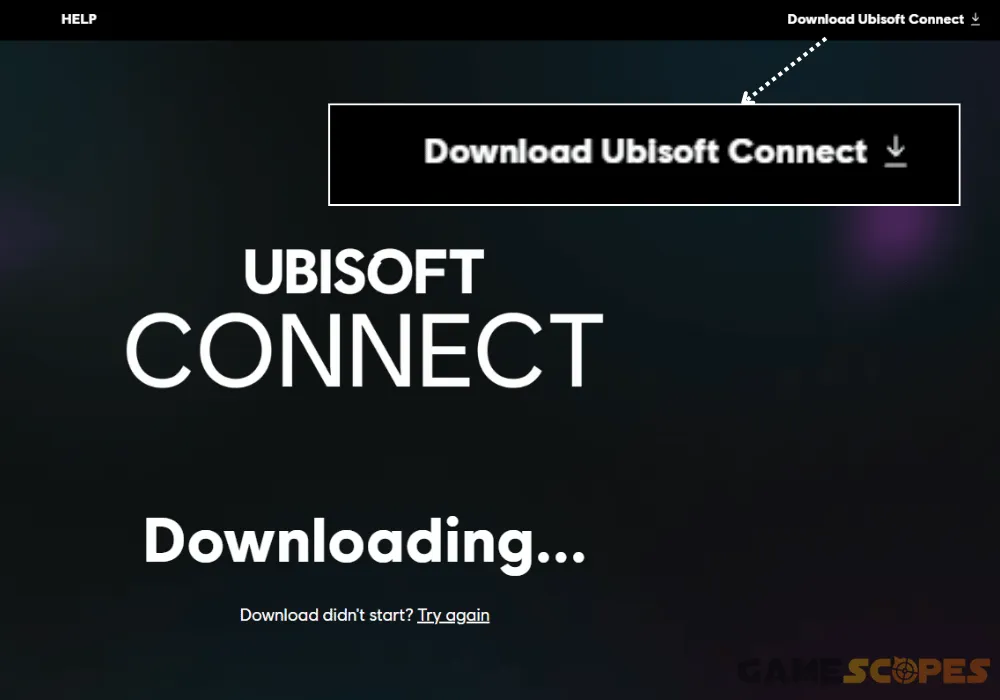
Once you’ve downloaded the executable file, run the prompt and follow the steps to re-apply the latest version of Ubisoft Connect.
6. Allow XDefiant Through Windows Firewall
Method 6/9
Not allowing XDefiant through your Windows PC’s firewall may prevent the game from launching at all or cause it to crash during or after it has finished loading.You can check which programs are allowed through your PC’s firewall and manually specify which apps have access to your network.
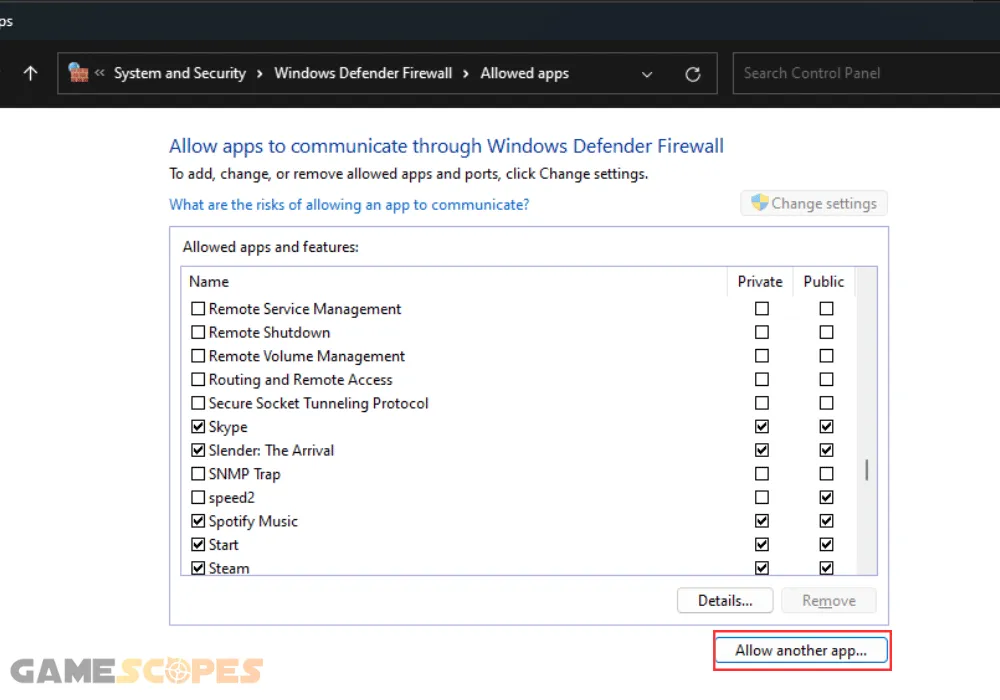
Follow these steps to allow XDefiant through your PC’s firewall:
- Select “Start” and type “Allow an app through Windows Firewall.”
- Click on “Allow another app” at the bottom of the firewall section.
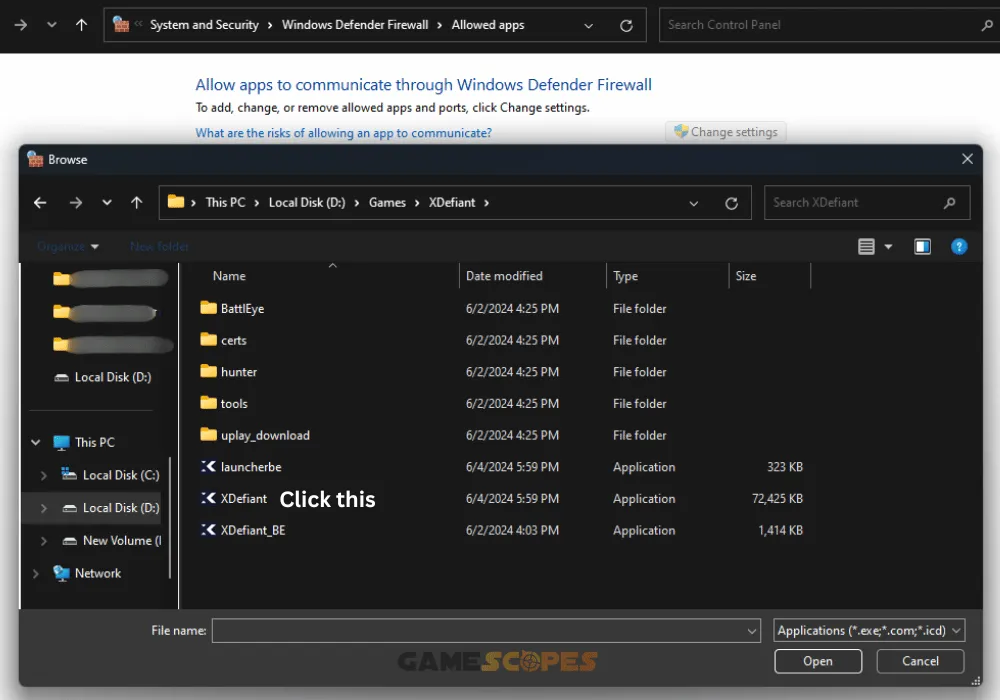
- On the next page, click on “Browse” and go to XDefiant’s directory.
- Select XDefiant’s executable launcher file to add it to the listings.
- Verify “XDefiant” is checked in the empty window prompt that will show.
- Click on “Add” and also check “XDefiant” in the firewall applications list.
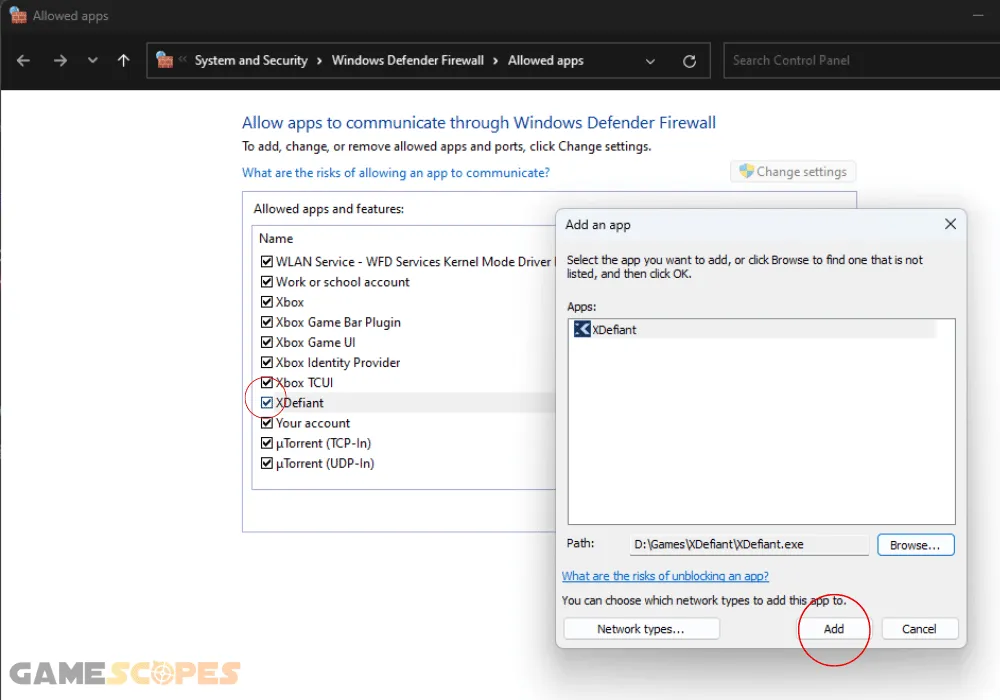
Tip: It is recommended to repeat the adding process for all executable files of XDefiant.
7. Update the Visual C++ Redistributables
Method 7/9
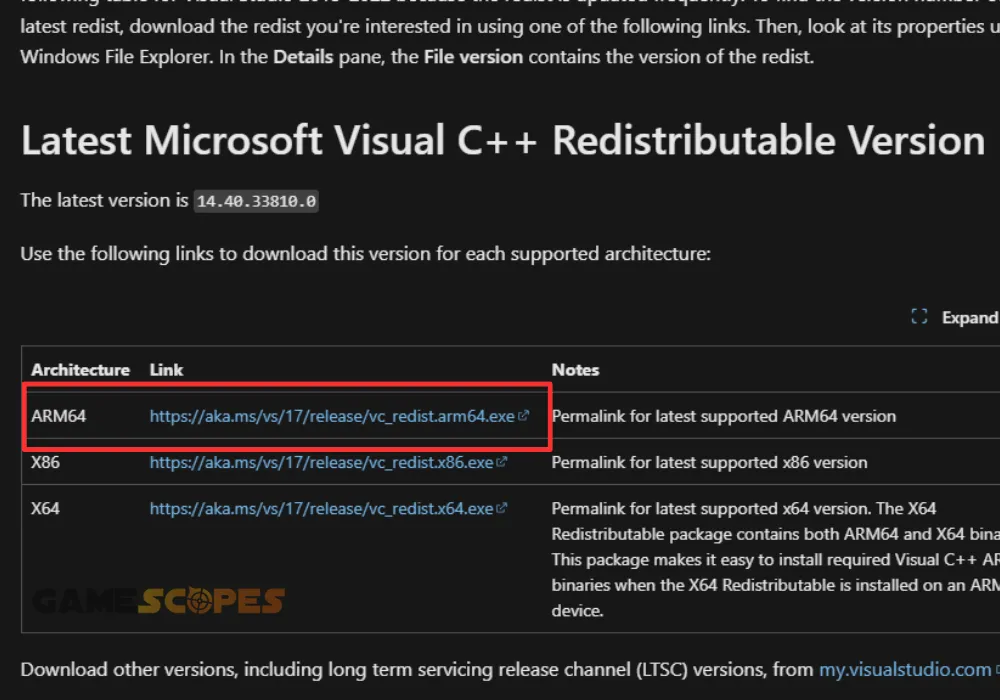
An outdated version of your system’s visual C++ redistributables could be preventing some of the recent games from launching, including XDefiant. You can install and apply the latest redistributable versions through Microsoft’s official download page and conduct the installation.
Follow these instructions to update the visual C++ redistributables:
- Navigate to Microsoft’s redistributables page on your computer.
- Scroll to “Latest Microsoft Visual C++ Redistributable Version.
- Click on the download link next to “ARM64” to begin the download.
- Run the executable file to begin the download of the redistributables.
Your system may require a restart right after the update is finished, so make sure to click on “Restart” in order for the changes to take effect. You should also note that an outdated version of the C++ redistributables may impact performance in terms of FPS and smoothness.
8. Uninstall & Install XDefiant On Your PC
Method 8/9
An essential solution for addressing issues with any game is conducting a clean reinstallation of the directory. The file check might have failed to detect corruptions in XDefiant’s installation folder, which are leading to the repeated launching or crashing issues.
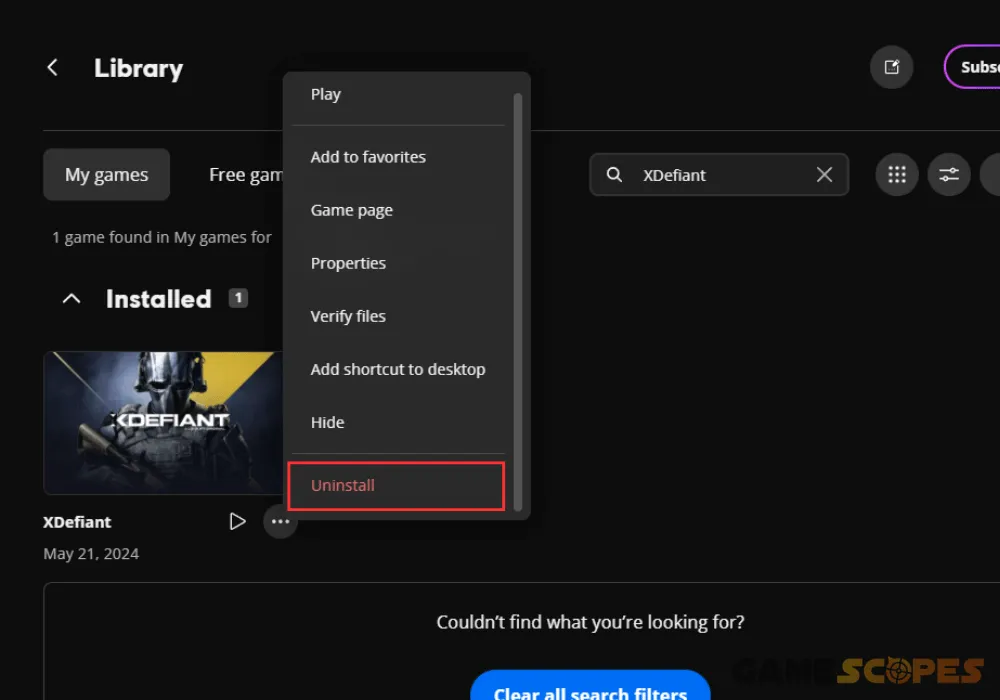
Follow these instructions to reinstall XDefiant on your PC:
- Open the Ubisoft Connect launcher on your computer.
- Head to “Library” and search for “XDefiant” in the field.
- Click the three dots next to XDefiant within the section.
- Click the “Uninstall” button at the bottom of the menu.
- Confirm the uninstallation of the game and then wait.
- Re-download XDefiant once it has finished uninstalling.
The size of XDefiant’s directory folder is about 30 GB so the reinstallation procedure may take between 15 up to 30 minutes based on your HDD/SSD speed and internet performance.
9. Move XDefiant to a Different PC Drive
Method 9/9
Perhaps, the repeat launching error has been a result of corruption with the game’s installation drive or an issue with the directory. This is why the next step is to move XDefiant’s game directory to a different drive on your computer and re-assign the path through Ubisoft.
Notice: Ensure you have a directory that has at least 40 GB of free space before proceeding!
Follow these steps to move XDefiant’s folder on a different drive:
- Access Ubisoft Connect and enter XDefiant’s “Properties” menu.
- Next, navigate to the “Installation” page and click “Open Folder.”
- Check the current installation directory of XDefiant and copy it.
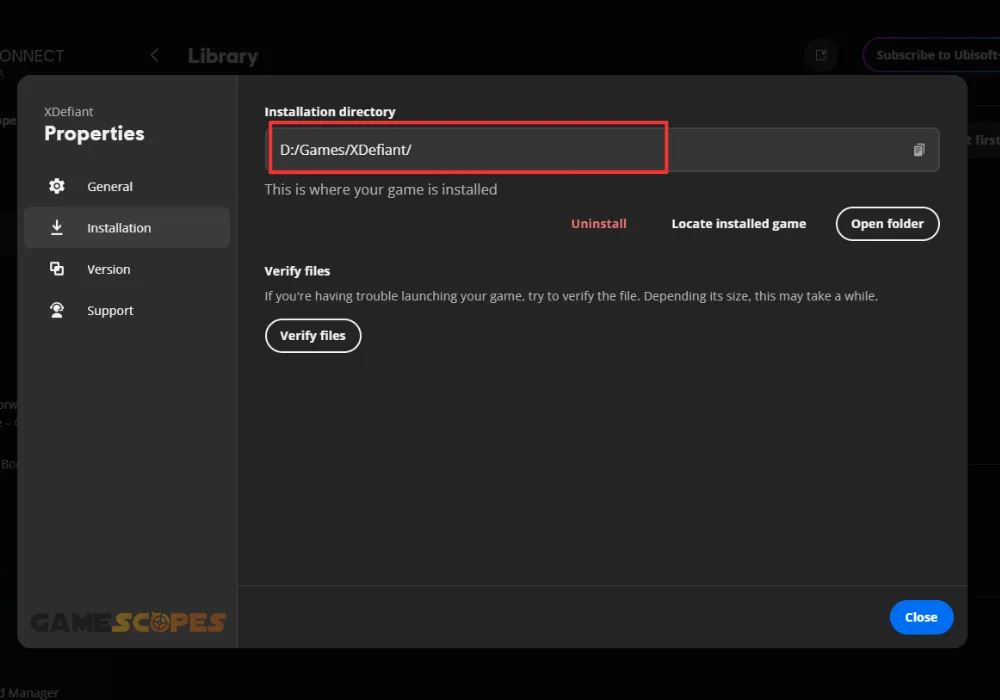
- Go to “This PC” and paste the directory in the navigation bar.
- Next, right-click on XDefiant’s folder and use the “Cut” function.
- Go to the new drive of the game and paste XDefiant’s directory.
- Use “Locate installed game” in XDefiant’s settings to add path.
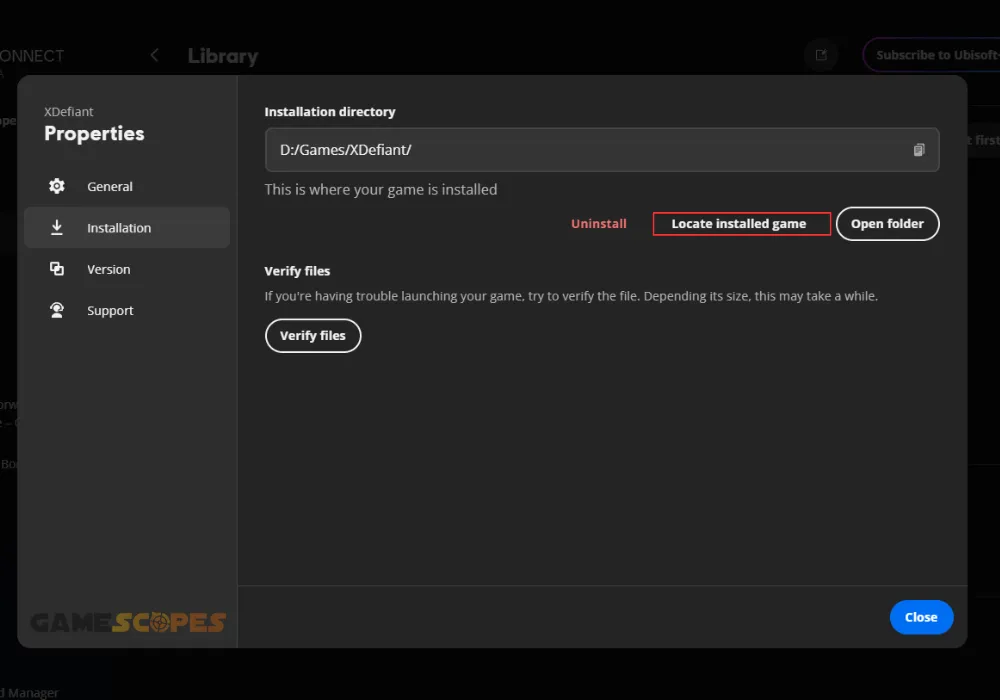
After moving XDefiant’s download path into an alternative directory, you will be unable to launch the game until the new path has been assigned.
Wrapping Up:
If XDefiant won’t launch on PC, run the program as an administrator and optimize the executable launcher file of XDefiant. If the issue persists, update the Visual C++ redistributables of the system, verify XDefiant’s files and conduct a reinstallation of the game’s directory.
Related Articles:
- XDefiant Services Not Available At This Time – [Quick Error Fix]
- How to Fix XDefiant Low FPS, Lag, or Stuttering (Solution for PC)
- How to Fix Wuthering Waves Not Loading/Launching On Mobile?
- Game Launch Error: 103003 Tarkov – 9 Quick Solutions!
- Why Is Hades 2 Not Launching On Steam Deck? (Quick Fixes)
- Gray Zone Warfare Not Launching on PC (Fix for Steam)
- Final Fantasy VII Rebirth Not Launching On PS5 – Fixed
- How to Fix Helldivers 2 Not Launching on PC? – Steps for Steam
- Supermarket Simulator Crashing/Not Launching – 7 Instant Fixes


![[FIXED] Tekken 8 Not Connecting to Server? - (PC/PS5/Xbox)](https://gamescopes.com/wp-content/uploads/2024/06/Tekken-8-Not-Connecting-to-Server_-Fix-for-PC_PS5_Xbox-300x240.webp)