![[Fixed] Helldivers 2 Failed to Join Game Lobby Error (7 Solutions)](https://gamescopes.com/wp-content/uploads/2024/05/Helldivers-failed-to-join-game-lobby-Featured.webp)

If you’re facing the Helldivers 2 failed to join game lobby error, we have found a solution!
For some players, the “Failed to Join Game Lobby” error has been preventing multiplatform or public gameplay for a while now. After carefully analyzing the error and discovering what’s causing it, we have come up with a few quick solutions that can resolve the error in less than 5 minutes.
So let’s take a look at the quick fix you can try!
If Helldivers 2 keeps displaying the “Failed to Join Game Lobby” error, disable “Crossplay” in the settings and attempt to join via “Quickplay.” Next, ensure Helldivers 2 is set as a firewall exclusion, verify the game’s file integrity, and play exclusively.
Now, keep reading to uncover all possible solutions for the issue!
Why Helldivers 2 Failed to Join Game Lobby?
Here are all possible causes for Helldivers 2’s multiplayer error:
- The “Crossplay” feature is activated within Helldivers 2.
- There’s an issue with the “Quick Play” or standard join.
- Helldivers or Game Guard aren’t specified as exclusions.
- There’s an issue with the PC or PS5’s internet connection.
- An underlying corruption of Helldivers 2’s system integrity.
How to Fix Helldivers 2 Failed to Join Game Lobby?
Tip: Have you tried reinstalling Helldivers 2 on your PC or PS5 to solve the issue?
1. Deactivate “Crossplay” in Helldivers 2
Method 1/7
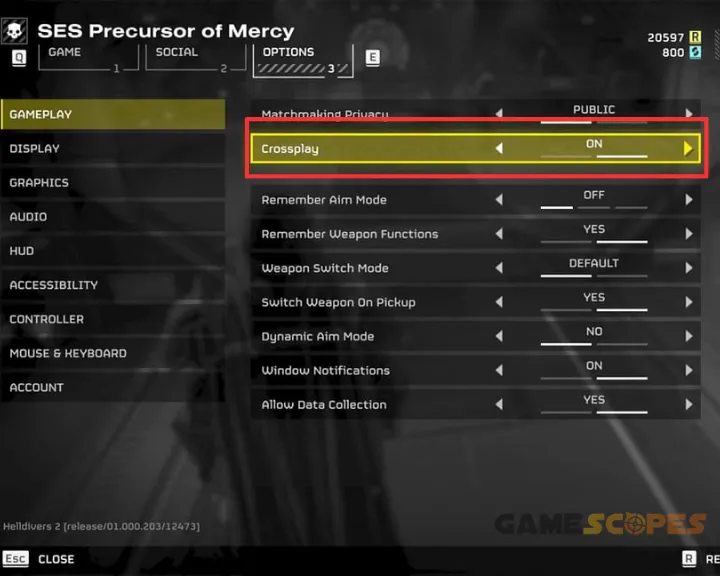
While in most cases the error is related to a temporary server overloading, you can match up with players only on your platform by disabling the “Crossplay” feature. Helldivers 2 supports multiplatform, which can create queue congestion on your end and result in a matchup suspension.
Here’s how to deactivate Helldivers 2’s “Crossplay” feature:
- Enter the “Options” menu of Helldivers 2 and go to “Gameplay.”
- Find the “Crossplay” option from the menu of available settings.
- Next, left-click the left arrow from the list to set the feature to off.
- Finally, ensure all changes have been saved and test Helldivers 2.
If you’ve successfully disabled Helldivers 2’s crossplay feature, you will only be able join lobbies with players who are on the same platform as you.
2. Attempt to Join Using the “Quick Play”
Method 2/7
You can determine if the game join keeps failing due to a server or matchmaking error by using Helldivers 2’s “Quick Play” feature. The game rule lets the player join another player’s ship to begin a random mission from the beginning or by answering the “SOS Beacon” to join a mission that’s already started.
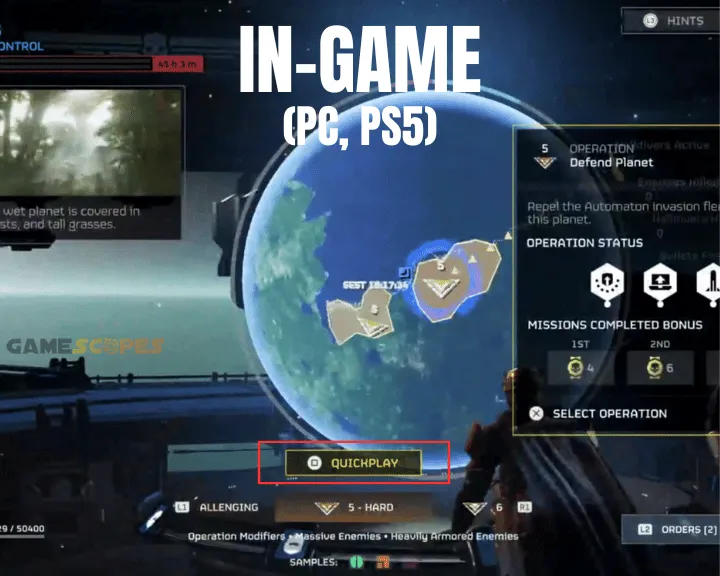
2.1 How to Join Via “Quick Play” On PC?
- Launch Helldivers 2 and press “E” for “Galactic War.”
- Next, wait for the “QUICKPLAY” option to show up.
- Press the respective keyboard or controller button.
- Wait until your PC attempts to join a game lobby.
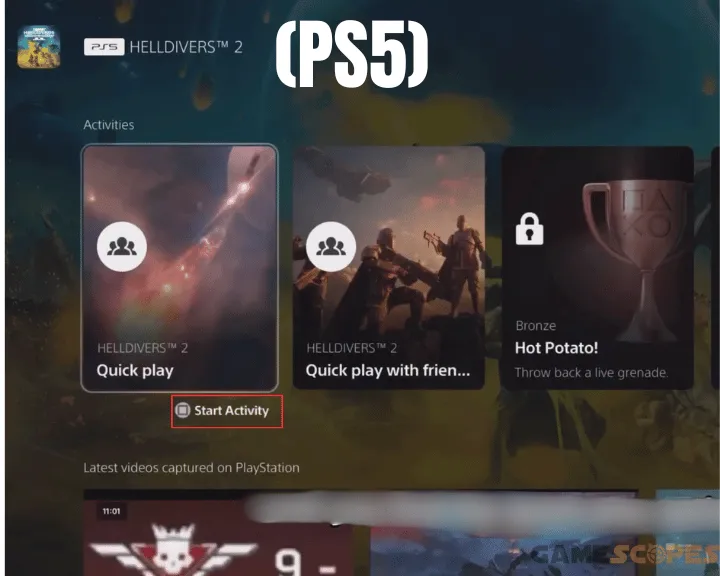
2.2 How to Join Via “Quick Play” On PS5?
- Highlight Helldivers 2 in your PS5’s main menu.
- Keep pressing “Down” on the controller’s D-pad.
- Once in the “Activities” section, locate “Quick Play.”
- Press square on the DualSense to launch the game.
- Check if your PS5 will join a Helldivers 2 game lobby.
Note: The “Quick Play” feature may not be available if you’re game-restricted or the connection isn’t stable!
3. Set Helldivers 2 as a Firewall “Exclusion”
Method 3/7
Not specifying Helldivers 2 as a “Firewall Exclusion” may cause multiplayer issues or prevent solo queue access until all permissions are granted. That’s why the next step is to set Helldivers 2 as an “exclusion” for the firewall, so the game can run properly and access all required directories.
3.1 How to Find Helldivers 2’s Default Directory?
Specifying the game’s installation directory as an exclusion for the firewall requires knowing the system path first.
Follow these steps to acquire the default system path of Helldivers 2:
- Open the Steam launcher on your PC and navigate to “Library.”
- Right-click on Helldivers and hover over the “Manage” button.
- Click “Browse Local Files” then click a blank part of the directory.
- By default, the directory is at C:\SteamLibrary\steamapps\common\Helldivers 2”
- Copy the system path of Helldivers 2 and exit the local files of the game.
3.1 How to Find Helldivers 2’s Default Directory?
- Open “Start” and type “Virus & threat protection” in the field.
- Press “Enter” and scroll to “Virus & threat protection settings.”
- Next, click the “Manage Settings” button underneath the tile.
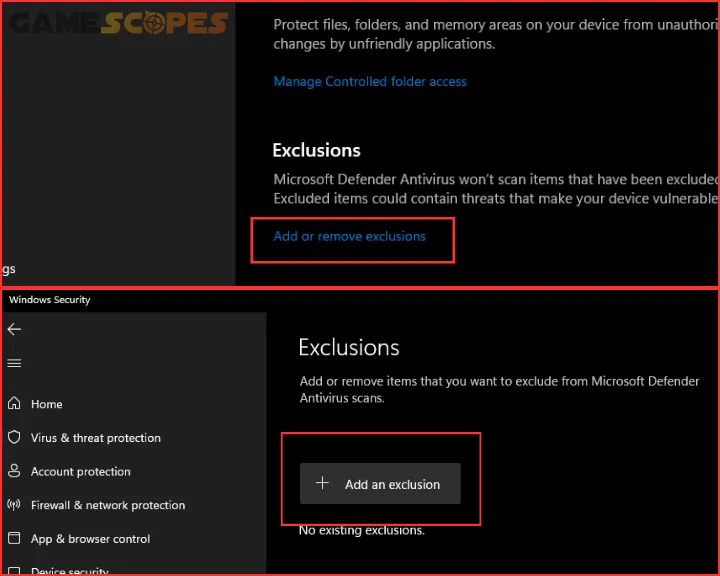
- After that, scroll to the bottom and locate the “Exclusions” field.
- Click on the blue option button “Add or remove exclusions.”
- Click “Yes” on the confirmation prompt and press the “+” sign.
- Select “Folder” and navigate to Helldivers 2’s exact directory.
- Follow the remaining instructions to add Helldivers 2 as an exclusion.
Note: You can manage, edit, or remove Helldivers 2’e exclusion once added!
4. Inspect your Device’s Internet Connection
Method 4/7
The next is to ensure your device has established a secure internet connection to ensure Helldivers 2 has proper multiplayer access.
4.1 How to Inspect Internet On PC?
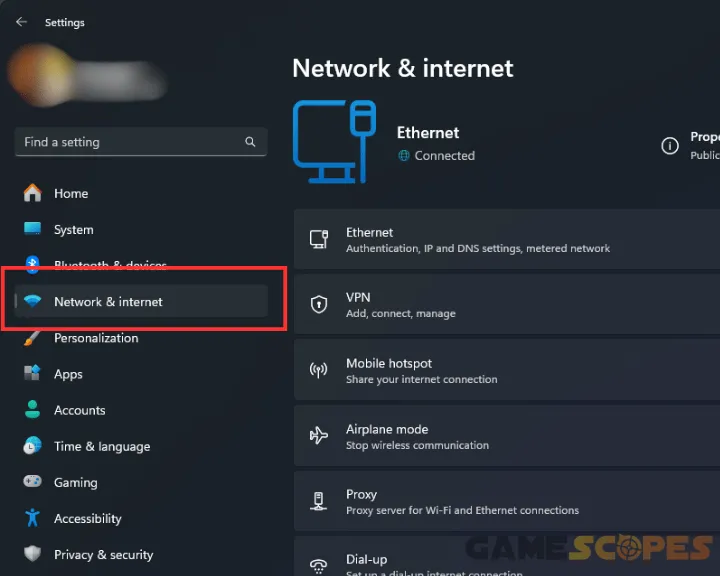
- Select “Start” and enter the “Settings” app on your PC.
- Navigate to the “Network & Internet” section on the page.
- Check the status of the network at the top of the section.
- Ethernet: Check the physical cable connection of the PC.
- Wi-Fi: Reconnect to the Wi-Fi through the system taskbar.
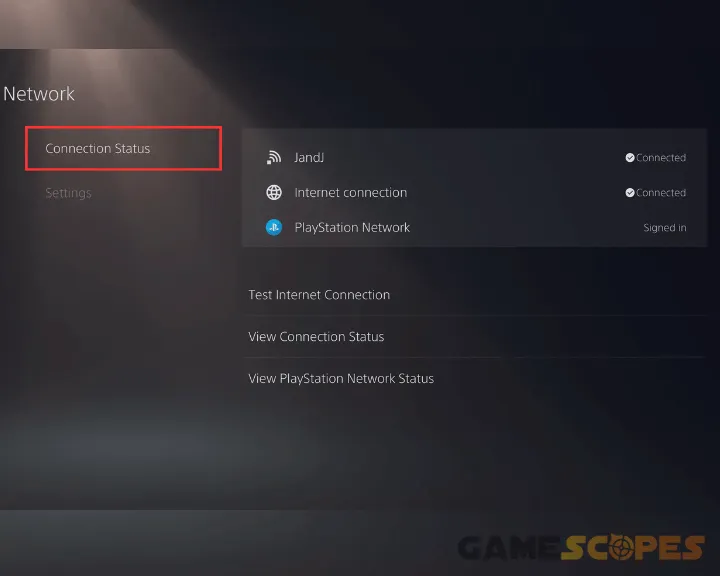
4.2 How to Inspect Internet On PS5?
- Start up your console and access the “Settings” menu.
- Select “Network” and click on “Test Internet Connection.”
- To connect, go to “Settings” → “Set Up Internet Connection.”
- Choose “Wired” or “Wireless” and follow the respective instructions.
Note: If the connection is unsuccessful, power cycle the network router and re-seat the Ethernet cord.
5. Verify the Files Integrity of Helldivers 2
Method 5/7
You may encounter the “Failed to join game lobby” within Helldivers 2 due to the corrupted integrity of the game files. You can conduct a game file repair through Helldivers 2’s Steam launcher settings to restore the default state of the game’s directory.
Follow these instructions to verify Helldivers 2’s file integrity:
- Open the Steam launcher and access the “Library” section.
- Right-click on Helldivers 2 from the game menu on the side.
- Click “Properties” and navigate to the “Local Files” section.
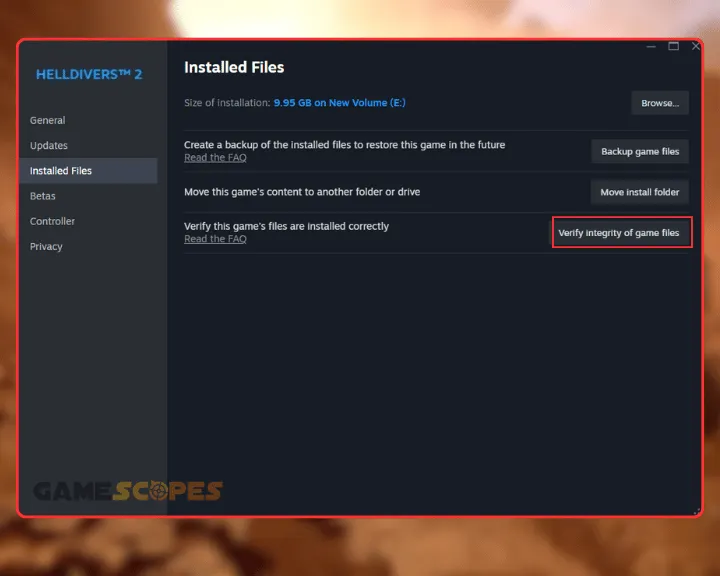
- Click “Verify integrity of game files” from the menu to check.
- Wait until the process is finalized and attempt to join a lobby.
6. Allow “Game Guard” Through the Firewall
Method 6/7
Helldivers 2’s advanced nProtect Game Guard anti-cheat software may be interfering with your Windows’s firewall and preventing you from joining a game lobby. There’s a method to allow all of Helldivers 2’s files including Game Guard through the Windows firewall to solve the issue.
- In “Search,” type “Firewall” and press “Enter” to open the page.
- Click “Advanced Settings” at the blue links on the page’s bottom.
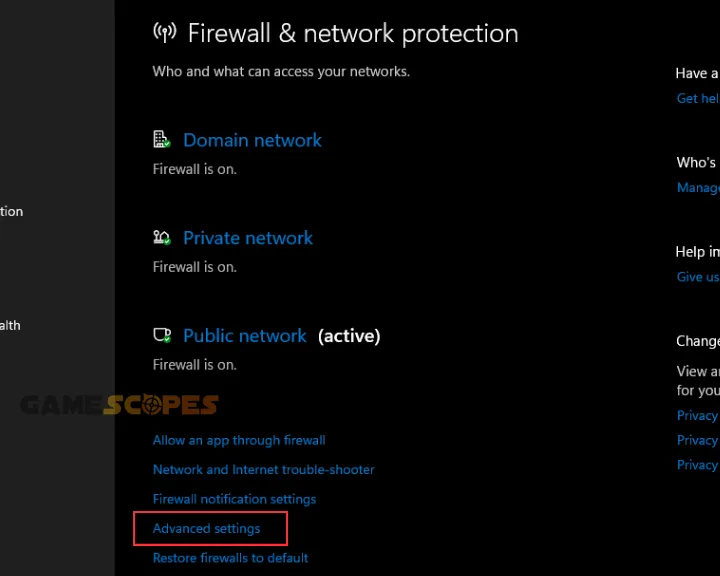
- Next, access the “Inbound Rules” at the top of the firewall section.
- Scroll down until you use “nProtect GameGuard Service | npggsvc.”
- Double-click the anti-cheat’s tile from your PC’s app firewall listings.
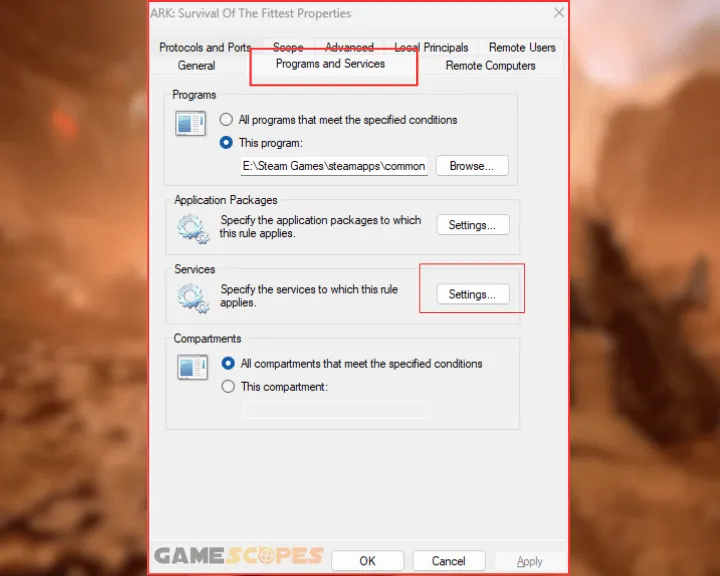
- Access the “Program and Services” tab from the top of the page.
- Next, click on “Services” and press the “Apply to this Service” button.
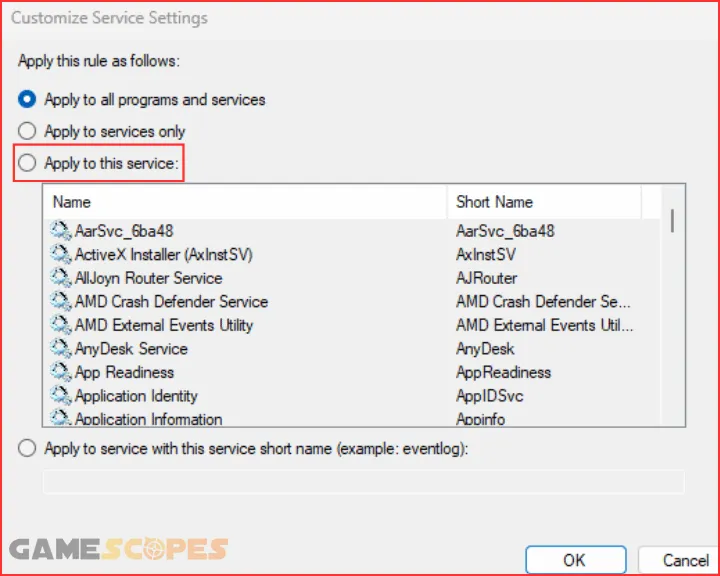
- Apply the changes and exit Game Guard’s firewall configuration section.
- Repeat for the “Helldivers 2” tile from the list if it can be found in the list.
Notice: Ensure Helldivers 2’s Steam directory is also allowed through the firewall!
7. Play Exclusively Until Servers Improve
Method 7/7
A guaranteed solution for the “Failed to join game lobby” Helldivers 2 is to play exclusively with friends until servers improve. While easier said than done, private matchmaking with friends offers the best Helldivers 2 experience so far and saves you a lot more time compared to public or solo-que joining. So, gather up and attempt to start a friends-only Helldivers 2 match to determine if the “Failed to join game lobby” error persists!
Note: Re-attempt public matchmaking once every 1-2 hours to determine if server stress has reduced.
Wrapping Up:
To solve the Helldivers 2 failed to join game lobby error, set “Crossplay” to “Off” in Helldivers 2’s settings, attempt to join a game via “Quickplay” and set the anti-cheat as a firewall exclusion. If the issue persists, repair Helldivers 2’s files and play exclusively until the servers are restored!
Related Articles:
- Helldivers 2 Low FPS on PC – Fix for Lagging & Stuttering
- Helldivers 2 Crashing on PC – Fixed in 9 Easy Solutions
- Helldivers 2 Multiplayer Not Working – 9 Fixes for PC/PS5
- How to Fix Helldivers 2 Not Launching on PC? – Steps for Steam
- How to Fix Helldivers 2 GameGuard Initialize Error Code 114?
- Elden Ring Multiplayer Not Working – Fix for PC/PS4/Xbox
- The Outlast Trials Co-Op Not Working – Fix for PC/Xbox/PS5
- Why Last Epoch Not Connecting to Server? – Get Connected Now!