
![[FIXED] Lenovo Legion Go Not Turning On - (7 Instant Solutions)](https://gamescopes.com/wp-content/uploads/2024/04/Lenovo-Legion-Go-Not-Turning-On-Featured-Featured.webp)

Lenovo Legion Go not turning on and you don’t know why? We can help you solve the issue!
Navigation Table
Toggle
Addressing startup faults with the Lenovo Legion Go requires extensive knowledge of most Windows functions and knowing the Legion Go’s button combinations.
This guide will help you operate the Legion Go while it is turned off and eliminate potential issues with the console’s startup!
If the Lenovo Legion Go isn’t turning on, inspect the physical condition of the “Power” button, reset Legion Go’s cache, and boot the console under “Safe” mode. If the issues persist, check if there are charging issues and restore the device’s Windows.
We can also help you with not charging or not reading SD card problems on your Lenovo Legion Go!
Why My Lenovo Legion Go Won’t Turn On?
Here’s a quick analysis of why the Legion Go is refusing to start up:
- There’s a fault with the Legion Go’s “Power” button.
- The console’s battery has not been charged properly.
- There’s defective charging equipment or a bad outlet.
- Corrupted software files are preventing the start-up.
- There’s a hardware or battery issue with the console.
Proceed further into the guide to explore reliable solutions for Legion Go’s startup issues!
Lenovo Legion Go Not Turning On - [Quick Fix]
Tip: Try all steps, at least one of them will help!
1. Exit “Sleep Mode” On the Legion Go
If the Legion Go doesn’t seem to respond to any inputs or button presses, the console may have entered a “Sleep” mode bug. It is a condition where the Go fails to “wake up” and respond to pressing the “Power” button until a charger is connected or the “Power” button is pressed for longer.
To start up the console ordinarily, you must press and hold the “Power” button for 3 seconds, whilst existing “Sleep Mode” requires holding it for at least 10–15 seconds.

How to Exit “Sleep” Mode On Lenovo Legion Go?
You can quickly exit the “Sleep” mode of the Legion Go by connecting it to a charger and holding the “Power” button until the display illuminates. Then, you can release the button and wait until the Windows OS loads up before testing the functionality.
Note: The charger must be in proper condition to exit the Lenovo Legion Go’s “Sleep” mode.
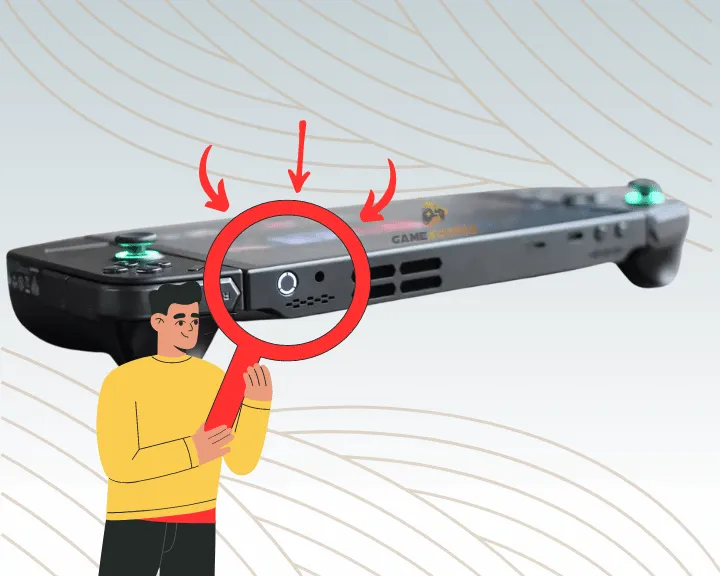
2. Inspect the Legion’s “Power” Button
The next solution is to check if there’s a functionality fault with the “Power” button, preventing the Legion Go from starting up and loading Windows. Ensuring the “Power” button is in a functional state verifies that the console will start up properly every time without producing errors.
Here’s how to test and troubleshoot the Legion Go’s “Power” button:
- Check the physical condition of the button and listen for unusual noises.
- Test all the button’s functionalities by pressing, holding, and releasing.
- Remove any debris or physical obstructions underneath the power button.
How to “Force” Reset the Lenovo Legion Go?
If the console’s power button doesn’t seem to be defective, you can initiate a force reset and jump-start the motherboard by holding the “Power” for 10–15 seconds. Before initiating the reset, ensure the console is connected to the supplied charger, so it can withdraw power.
The system may not start if the console is under “Sleep Mode” prior to pressing the “Power” button. Once any functionality states no longer influence the Legion Go, you can start up the system by pressing and holding “Power.”
Note: Holding “Power” while the console is still on causes the Legion Go to enter “Sleep” mode.
3. Refresh the System of the Legion Go
You can address temporal or non-lasting issues with the Lenovo Legion Go by refreshing the system and rebooting the Windows OS. For this purpose, you must press and hold a specific combination of buttons on the console, until the system automatically powers off.
Start the system refresh by pressing and holding both “Legion” buttons and the “Power” button simultaneously. Hold the button combination for at least 5–7 seconds and wait until the Windows OS of your Legion Go shuts down.
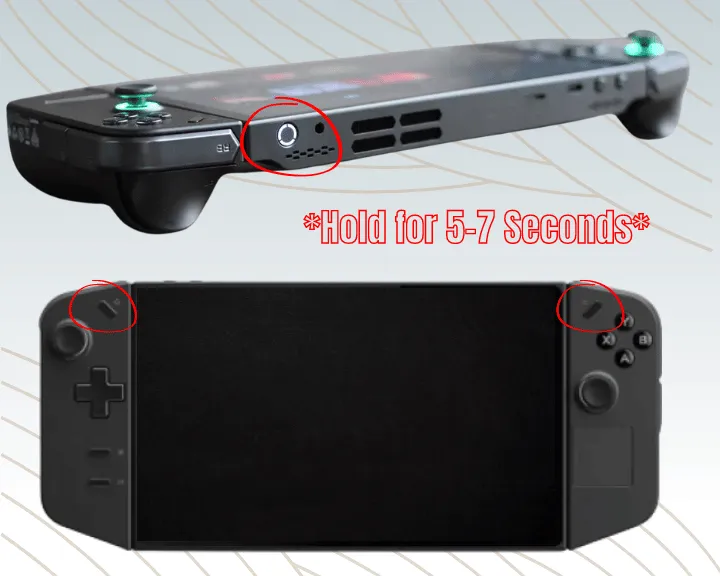
Tip: Connect the Legion Go to a charger if the battery is low or near 0%.
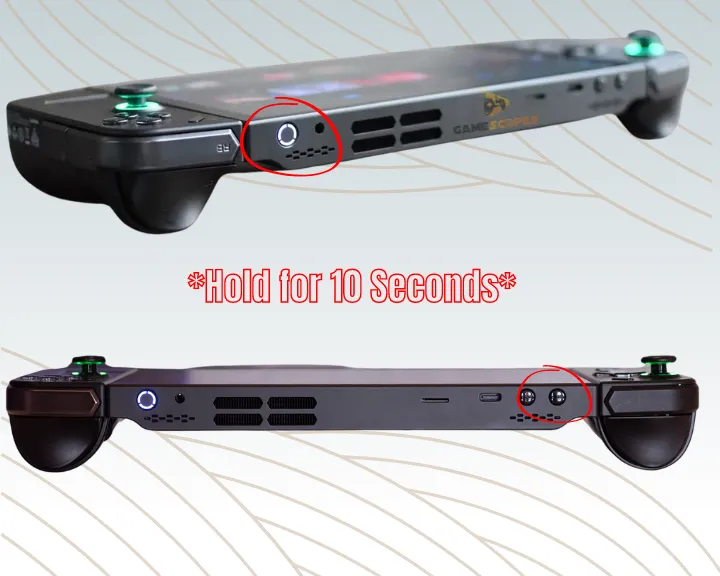
4. Erase the Legion Go’s System Cache
Performing a system reset on the Lenovo Legion Go will address the startup fault and resolve other underlying issues with the system or the hardware. It causes the console’s Windows to be re-loaded from the BIOS and ROM, resulting in a complete cache reset.
Here’s how to perform a system reset on the Lenovo Legion Go:
- Connect the Legion Go console to the USB type-C charger.
- Plug the charger into an A/C outlet and wait for 10 seconds.
- Hold the “Volume Down” and “Power” buttons simultaneously.
- Wait until the BIOS screen loads up on the Lenovo Legion Go.
- Power off the system and reboot the console to address the issue.
In some cases, the Lenovo Legion Go could be refusing to boot due to an issue with the BIOS or the start-up priority. You will be able to specify the boot priority in the BIOS menu of the Legion Go and ensure there is an improperly selected drive or directory.
Note: If accessing the BIOS menu is not possible, try by pressing “Power” and “Volume Up.”
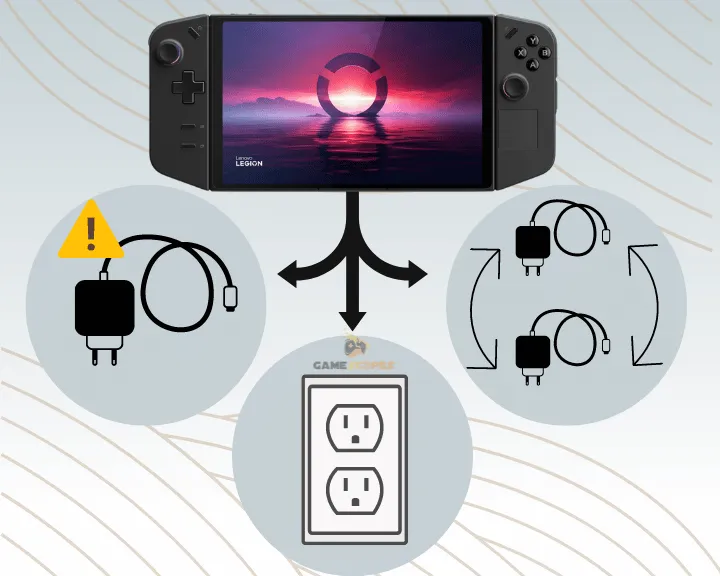
5. Resolve Legion Go Charging Issues
The Lenovo Legion Go could develop startup issues due to improper console charging or equipment fault. The next step is to attempt various troubleshooting techniques to test the charging of the Legion Go and eliminate underlying faults.
- Inspect all the Charger Connections
The first step is to ensure all cable connections of the Lenovo Legion Go’s charger are properly secured. The charger consists of a USB type-C cable and a standard 20W-100W charging adapter. Ensure the connection between the adapter, console, and power source is secure.
You should also note that using any unidentified equipment in the setup of your Legion Go may cause the battery to wear out faster!
- Change the Console’s Charging Source
After ensuring there isn’t a technical fault with the charger, the next step is to relocate the Lenovo Legion Go’s charger to a different power source. A defective electrical outlet can continuously prevent Legion Go from drawing electricity even if the equipment is in proper condition.
You can quickly determine if a particular outlet is faulty by installing your phone’s charger or connecting any low-voltage electrical appliance!
- Use an Alternative Charging Equipment
If the Lenovo Legion Go is still refusing to receive power while connected, you should install an alternative USB-C cable and test with a replacement power adapter. If either of the charging components are faulty, the electricity that should otherwise reach the Legion Go’s charging port will be interrupted.
Notice: Attempt to notice any faults and visual damages on the charging equipment of the Legion Go!
6. Boot Legion Go Under “Safe” Mode
Besides starting up the Lenovo Legion Go regularly, you can boot the console under “Safe” mode to bypass corrupted software data or files. Starting any Windows device under “Safe” prevents third-party services from starting up and allows configuring the OS while offline.
Here’s how to start the Legion Go’s Windows under “Safe” mode:
- Ensure the Legion Go is powered off and plug it into a charger.
- Press the “Power” button for 2–3 seconds and then release.
- Keep pressing the “F8” key repeatedly to enter “Recovery.”
- At the “Advanced Boot Options” menu, choose “Safe Mode.”
- Determine if the Legion Go will start successfully in Safe Mode.
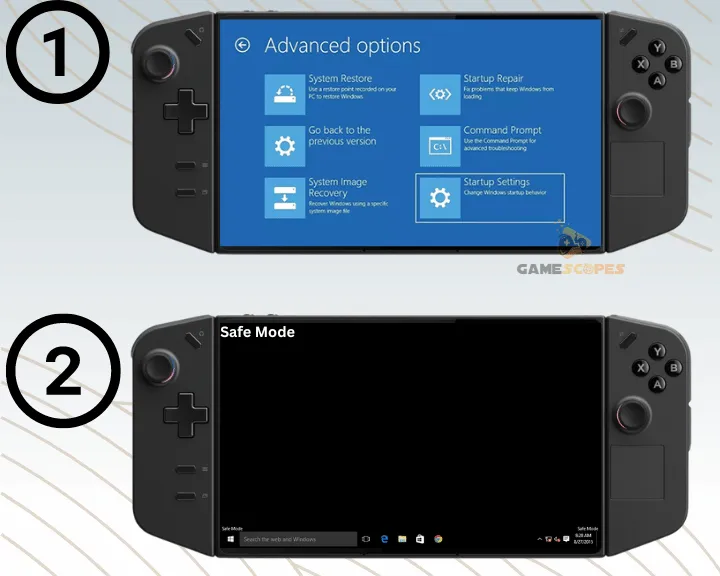
Note: If pressing “F8” didn’t work, you can boot in “Safe” mode through the “Windows Installation Media” or “Recovery Drive.”
7. Recover the Legion Go’s Windows
If you were unable to address the Lenovo Legion Go’s startup fault until now, you should restore the Windows to default settings. Even if the Legion’s Windows is currently not bootable, you should be able to initiate the reset through the “Recovery” settings of the OS.
Here’s how to initiate a Windows reset on the Lenovo Legion Go:
- Press the “Power” button on the Lenovo Legion console.
- After 2–3 seconds, start pressing the “F8” key repeatedly.
- Navigate to “Troubleshoot” from the “Recovery” screen.
- Choose “Reset this PC” to access the next options page.
- Pick whether you want to keep the device’s files or not.

Keep in mind that proceeding with a full system reset will erase all installed applications, data and logs that cannot be restored unless there’s a backup. Initiating the partial system reset will keep the device’s data but erase all pre-configured Windows settings of the Legion Go.
Note: It is recommended to fully reset the Lenovo Legion Go to address all possible faults!
Let's Wrap Up:
If the Lenovo Legion Go not turning on, check if there’s a fault with the “Power” button, start the console under “Safe” mode and troubleshoot charging issues. If the fault persists, erase the console’s cache and restore the Windows to default settings.
Related Articles:
- Lenovo Legion Go Not Reading SD Card – (Get SD Card to Work)
- Why is Lenovo Legion Go Not Charging? (The Fixes You NEED!)
- ASUS ROG ALLY Not Turning On – 6 Quick Solutions
- Steam Deck Not Turning On After Update?- (Fix It Now Easily)
- Sony PSVR2 Not Turning On – 8 Ultimate Solutions
- Nintendo Switch Not Turning On After Update – Instant Fix