How to Play Supermarket Simulator on Mac? (Step-By-Step Guide)
Nikolay Petrov
- Updated:
If you’re wondering how to play Supermarket Simulator on Mac (including MacBook and iMac), we’re glad to share with you that we’ve found a working way.
Since Supermarket Simulator is a game for Windows computers, as you can only install it from the Steam launcher, we’re going to use some external tools. The one tool that will help us install Supermarket Simulator on macOS is HyperPlay Game Launcher.
To play Supermarket Simulator on Mac, you must set up the HyperPlay game launcher and load the Windows version of Steam. Then, you must configure the launcher settings and finally install Supermarket Simulator on your Mac.
Next, we’ll unwrap all steps in detail…
Can You Play Supermarket Simulator on Mac?
Yes, you can install Supermarket Simulator on Mac as long as your computer runs macOS 14 Sonoma or later. If your Mac runs an older version, make sure to update the operating system now before you continue with the steps.
The way this works is by installing an emulator HyperPlay, allowing you to install Steam on your Mac with compatibility settings. This ultimately allows you to install games meant for Windows on your macOS computer, such as Supermarket Simulator.
Now that we know this, let’s jump into the steps!
How to Play Supermarket Simulator on Mac?
Important: Follow the steps consecutively!
1. Get the Windows Steam Version
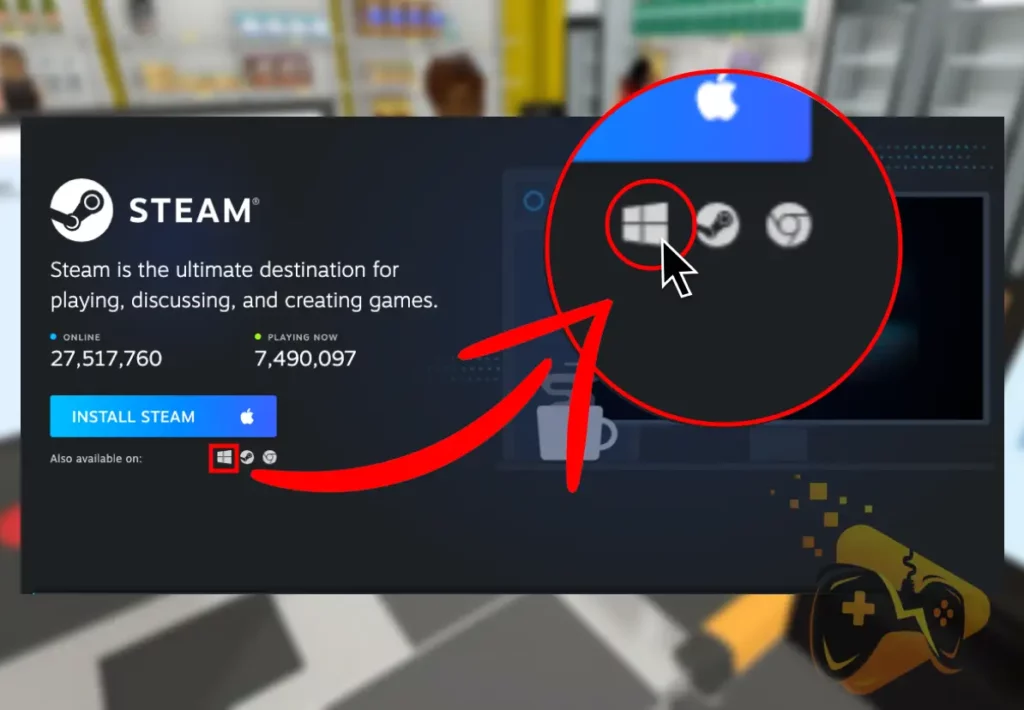
The first step is to download the Windows version of the Steam launcher on your Mac, which is an “.exe” file, that you wouldn’t be able to open. Yes, that’s correct, for now, you only need to download the “SteamSetup.exe” file and keep it on your Mac.
If you’re unsure how to acquire the file, go to Steam and click the Windows icon, next to the “Also available on.” If you’re on Mac, the big blue button will download the Mac version of the Steam launcher, which wouldn’t work in installing Supermarket Simulator.
2. Install HyperPlay on your Mac
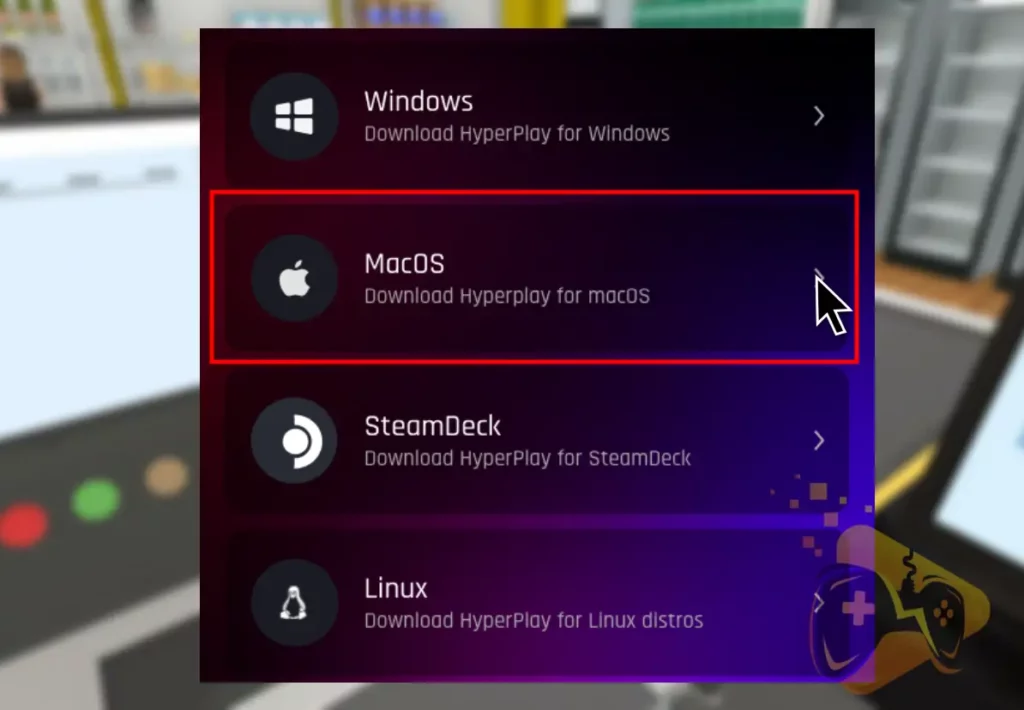
The next step is to install HyperPlay on your Mac, by following the provided link and clicking on “Download Hyperplay for macOS.”
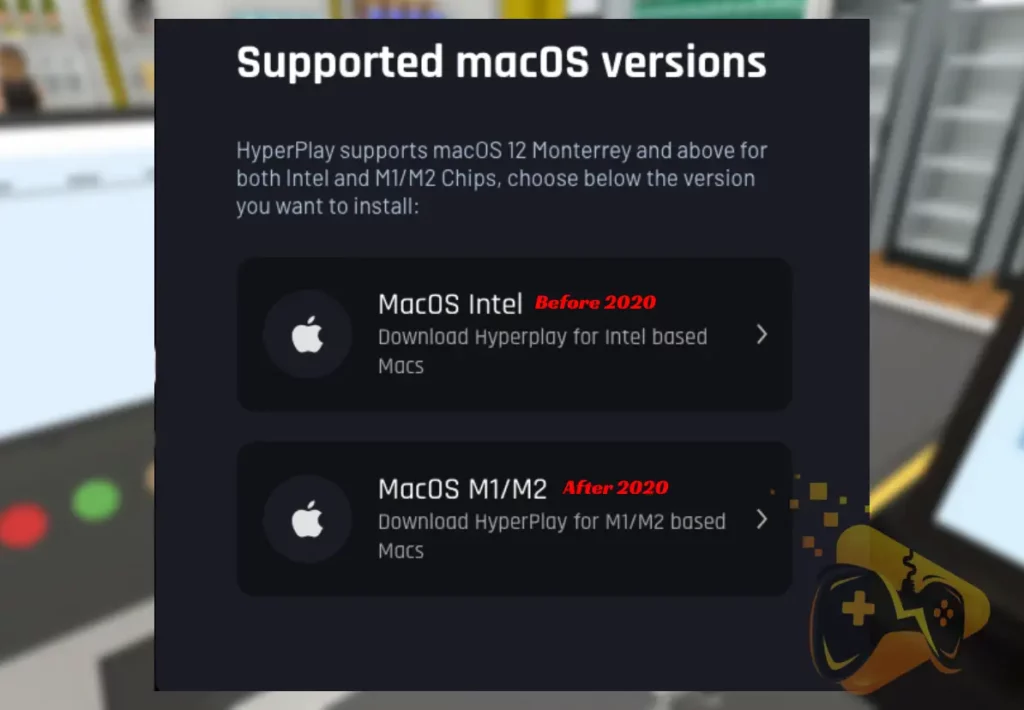
You’ll be prompted to select whether you use a Mac computer with an Intel processor or Apple’s M1/M2. Put simply, if your Mac computer was released before 2020, you got an Intel CPU, therefore if your Mac was released after 2020, you got the M1/M2 chip.
When the “HyperPlay-0.12.1-macOS-x64.dmg” file is downloaded, open it, drag the icon to the Applications folder, and viola! The HyperPlay launcher is now installed.
3. Upload Steam.exe to HyperPlay
The next step is to load up the downloaded Windows version of the Steam launcher, which is the “SteamSetup.exe” file, into the HyperPlay launcher.
That’s easy, just, follow the steps below:
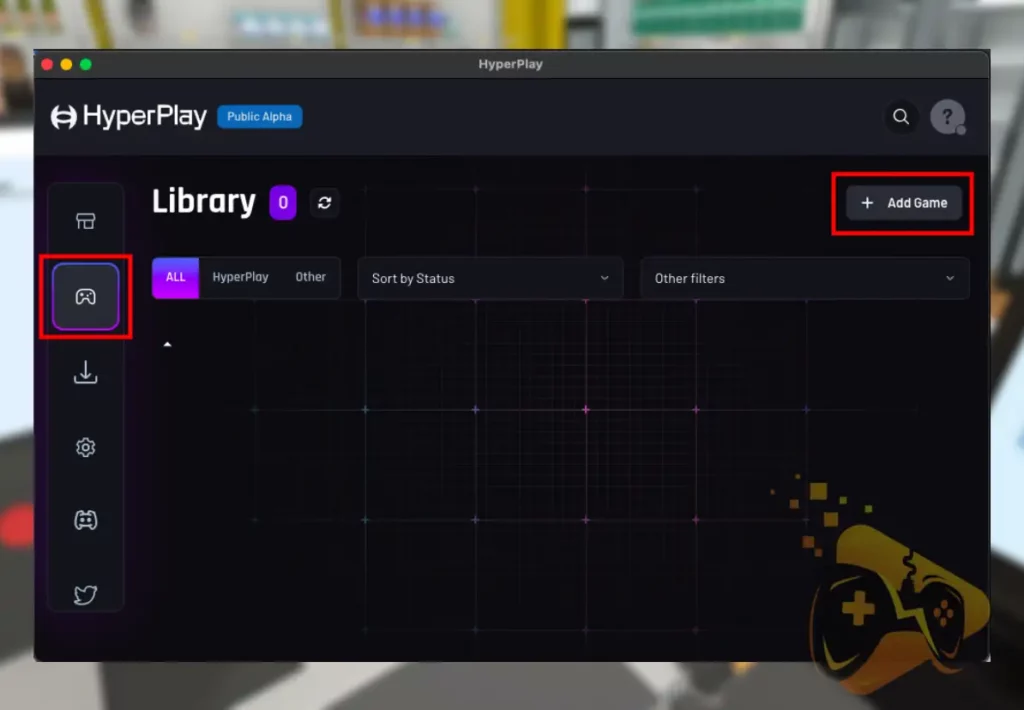
Open the HyperPlay launcher on your Mac.
Then, click the Library from the left pane.
Select “Add Game” in the top-right corner.
Optional: Give the launcher a name and image.
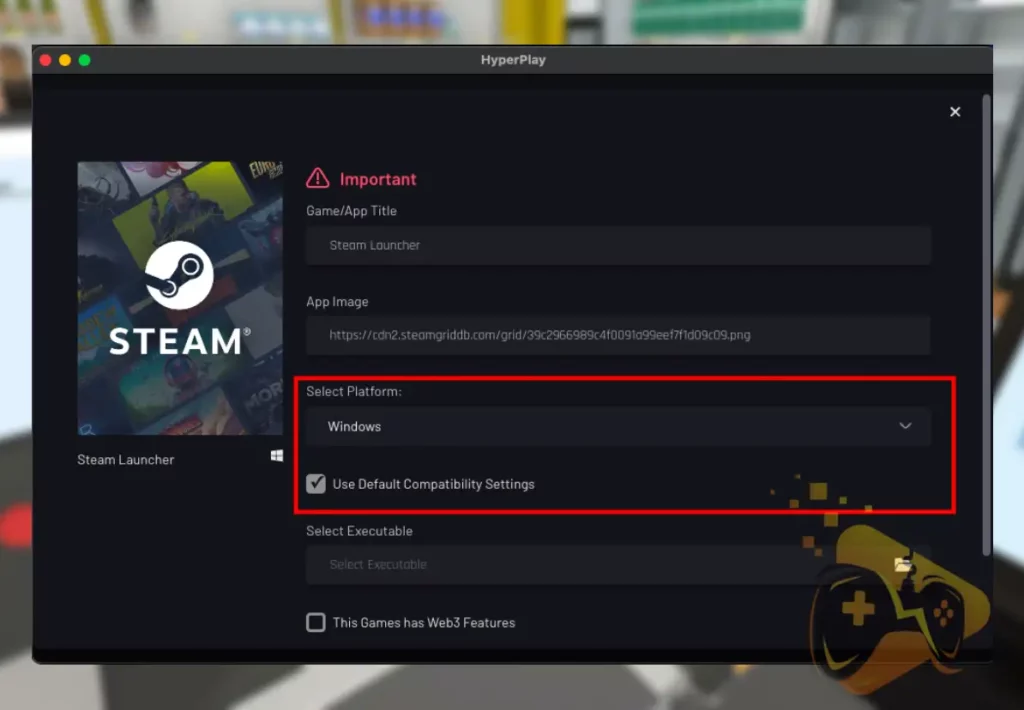
Under the select platform, choose “Windows.”
Tick the “Use Default Compatibility Settings.”
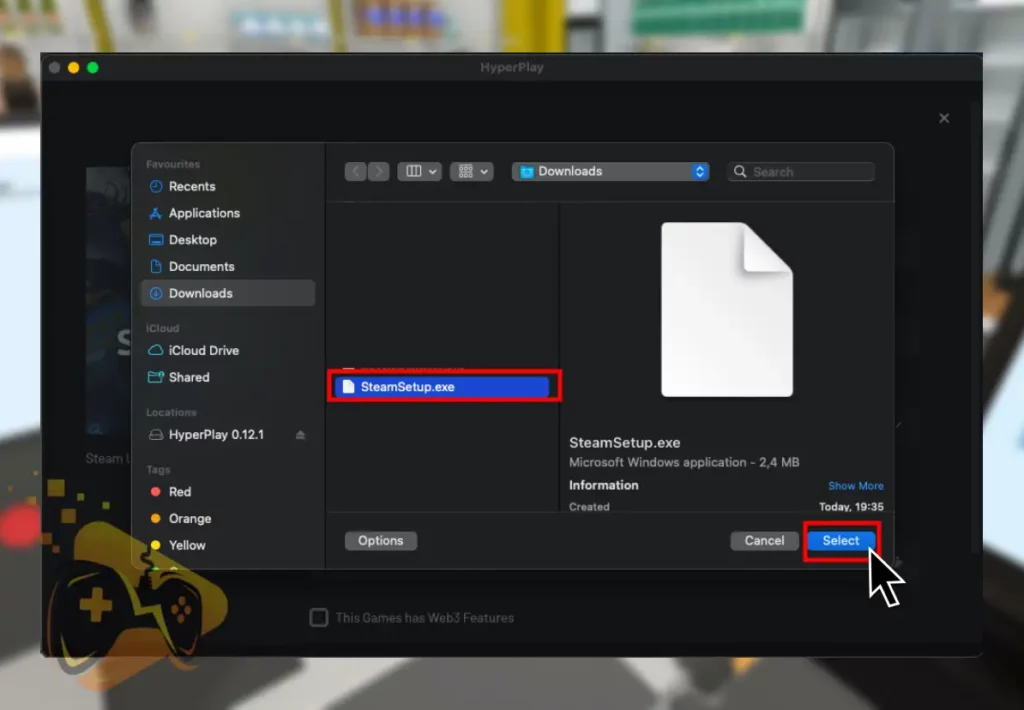
Go to “Select Executable” and add the launcher.
Info: This is the downloaded “SteamSetup.exe”.
That’s it. Now you gotta configure a few settings!
4. Configure the HyperPlay Settings
In order to install Supermarket simulator on Mac, you must configure the HyperPlay launcher settings, and then proceed with downloading the game. Unfortunately, this is an essential step as it involves downloading essential addons, required for the operation that we’re performing.
Here’s how to configure the settings of your HyperPlay launcher:
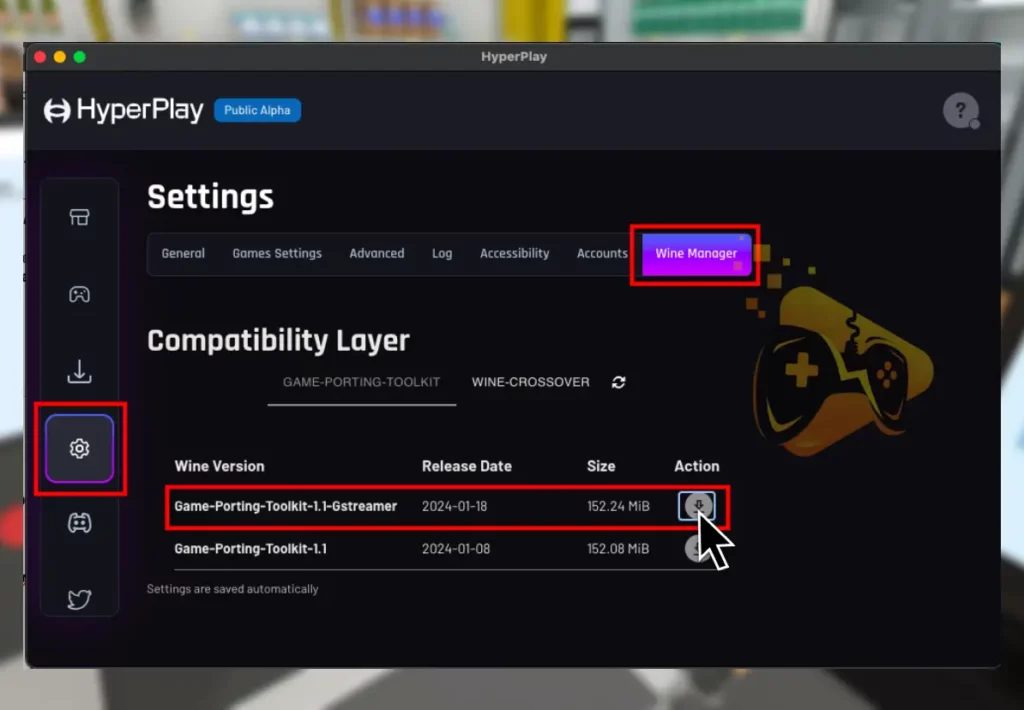
Access the HyperPlay Settings from the left pane.
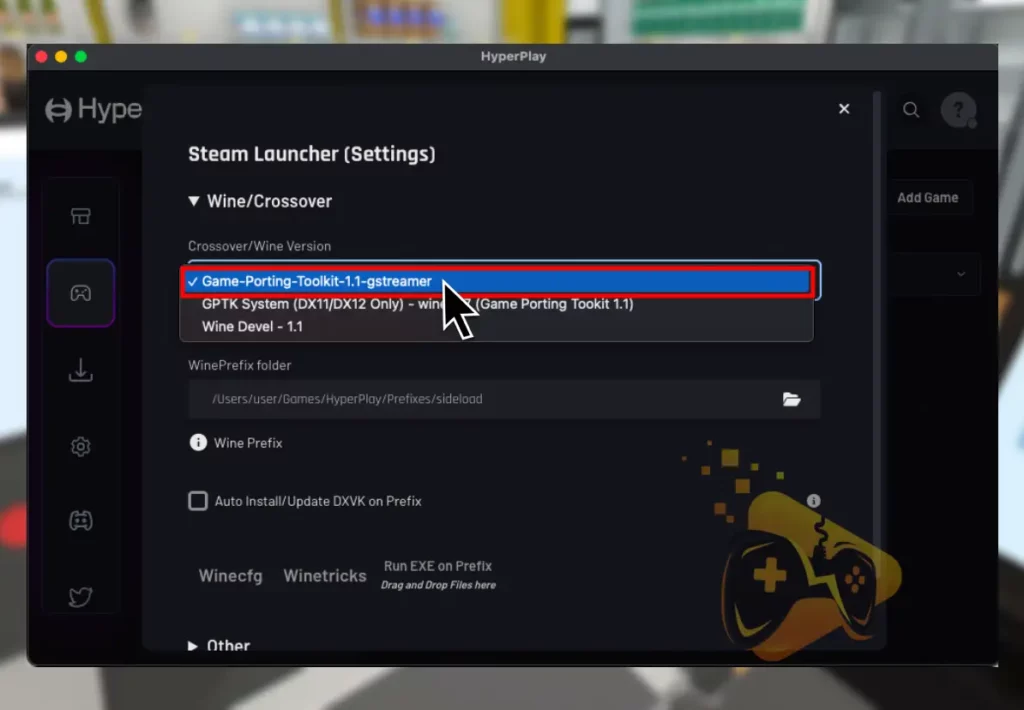
From the settings tabs, go to the “Wine Manager.”
Then, click on the “GAME PORTING TOOLKIT”.
Install the “Game-Porting-Toolkit1.1-Gstreamer”.
Info: The installation may take about 2–5 minutes.
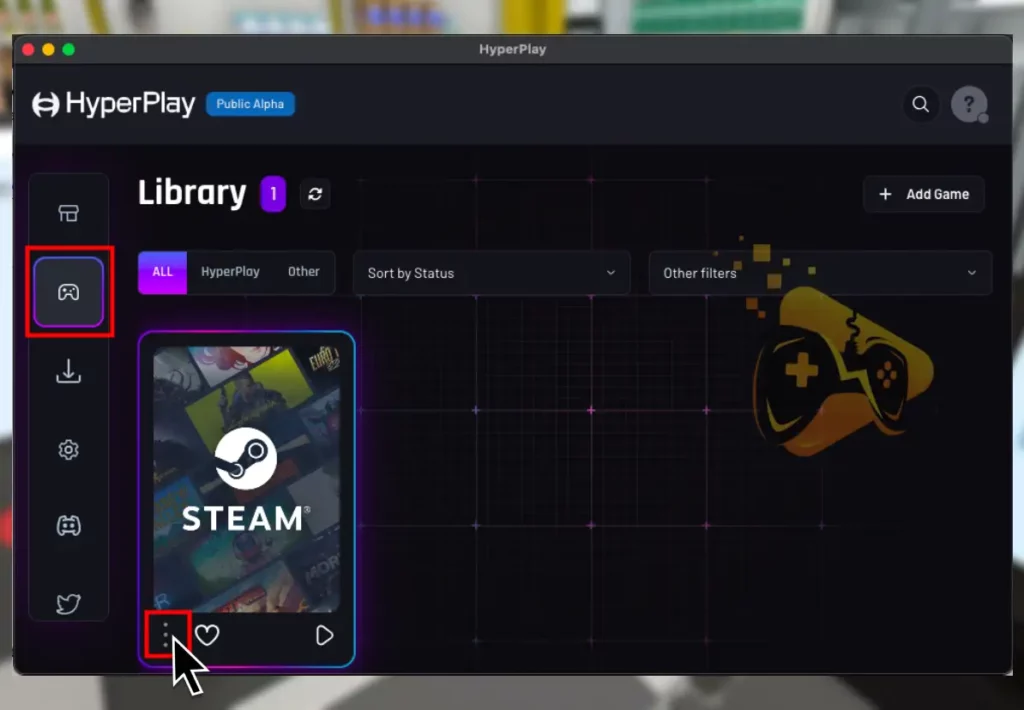
When ready, return to the HyperX Library on the left.
Click the three dots on the installed Steam launcher.
Then go to Settings, and choose “Gstreamer toolkit.”
That’s it. Now it’s time to learn how to install Supermarket Simulator on Mac!
5. Install the Supermarket Simulator
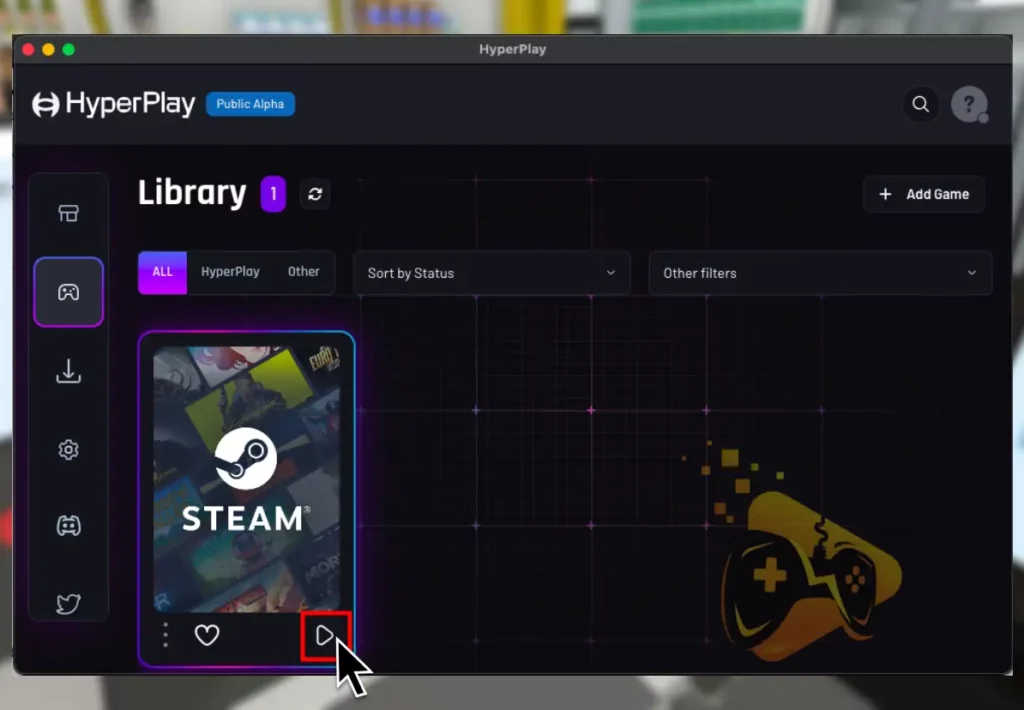
It’s finally time to open the Steam launcher through the Library of your HyperPlay launcher and sign into your account. This will provide you with access to your Steam Library and help allow you to finally install Supermarket Simulator.
That’s it! In fact, you can apply these steps to any game through your Steam launcher, and you’ll be able to play them on your Mac. This is as long as your Mac’s performance covers the game’s system requirements, otherwise, you’ll face game crashing or low FPS.
Let’s Recap: How to Play Supermarket Simulator on Mac?
Hence, to play Supermarket Simulator on Mac, you need to install the HyperPlay launcher and load the Windows version (.exe) of the Steam launcher. Then you need to configure the settings and you’re ready to install Supermarket Simulator on your Mac.
Hey there, fellow gamers! I'm the wordsmith behind GameScopes.com with near a dacade of experience in games and troublehsooting gaming devices. I am here to share my true passion and help everyone in the gaming industry.


![[Fixed] Helldivers 2 Failed to Join Game Lobby Error (7 Solutions)](https://gamescopes.com/wp-content/uploads/2024/05/Helldivers-failed-to-join-game-lobby-Featured-300x240.webp)


![[FIXED] Tekken 8 Not Connecting to Server? - (PC/PS5/Xbox)](https://gamescopes.com/wp-content/uploads/2024/06/Tekken-8-Not-Connecting-to-Server_-Fix-for-PC_PS5_Xbox-300x240.webp)