If your Valorant mic not working, then you must perform a thorough inspection both on your Valorant game and your physical microphone. This guide will provide Windows 10 and 11 solutions against non-working Valorant’s voice chat.
When your Valorant microphone is not working increase your mic sensitivity, allow the microhpone access and correct your voice chat settings. Additionally, update the microphone drivers, increase the Windows input volume and reinstall the game.
To unwrap how all of this is done, continue reading…
Why Does My Valorant Mic Not Work?
There are quite a few different reasons why your Valoran mic would not work in-game and why you can’t use the voice chat efficiently. This is why we’ve prepared a quick list containing all the reasons why your Valorant mic would not work.
Your microphone sensitivity is too low.
The microphone access is not allowed.
Your Microsoft mic’s driver is outdated.
Misconfigured Valorant voice chat setup.
System-related bug/glitch with Windows.
That’s everything that can impact your mic while playing Valorant. Let’s troubleshoot!
Valorant Mic Not Working - 6 Quick Solutions
Note: The steps below are optimized for Windows 10 and 11.
1. Increase Microhpone Sensitivity
If you still can’t communicate in Valorant, it’s not excluded that your microphone is not working or is set to very low sensitivity. This is why the next step is to go into the Windows settings and boost the sensitivity of your microphone, which can solve the problem.
Here’s how to increase your microphone’s input volume on Windows:
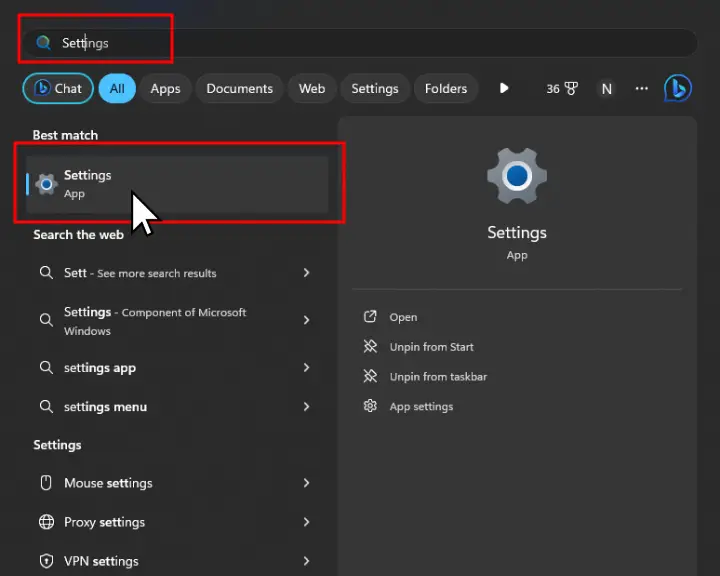
Click on the Start Menu and go to “Settings.”
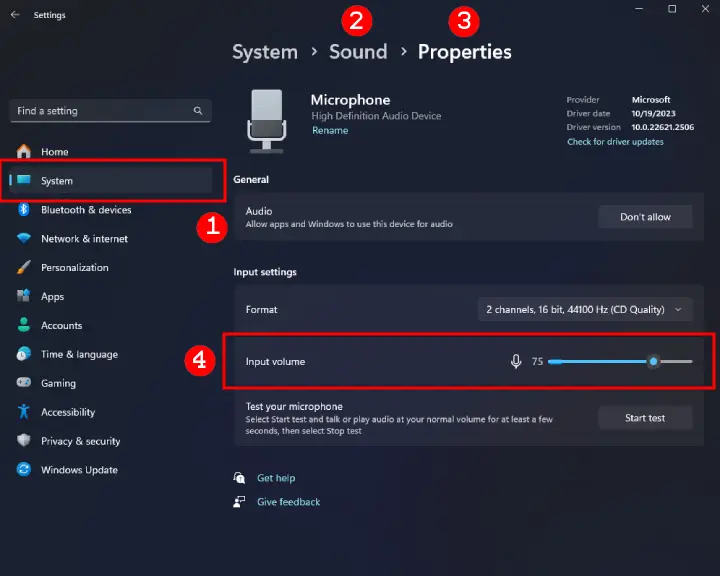
Go to “System” → “Sound” → “Microphone.”
Then, set the microphone’s input volume to 75.
When you’re ready, open Valorant and test whether the microphone is now working!
Quick Tip: Test Your Microphone!
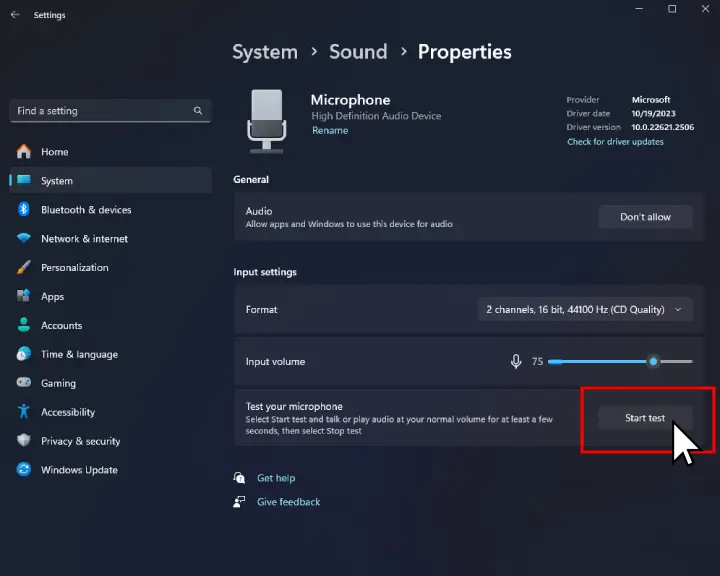
If you’re concerned that your microphone may not work, and that’s why the voice chat in Valoran is not working, perform a test. Go to Settings → System → Sound → Microphone and click “Start test.”
2. Enable the Valorant Mic Access
If you cannot use Valorant’s voice chat and your teammates can’t hear you, your Windows operating system may disallow the microphone access. This is why the first step is to reach into Windows’s Privacy & Security settings and toggle “ON” the microphone access for the apps on your machine.
Here’s how to enable the microphone access on Windows:
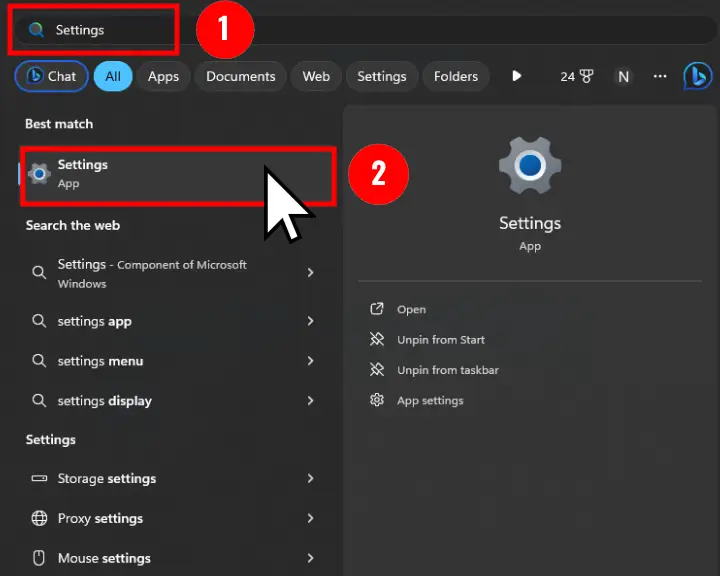
Click on the Start Menu from the Taskbar.
Type “Settings” and click on the Settings.
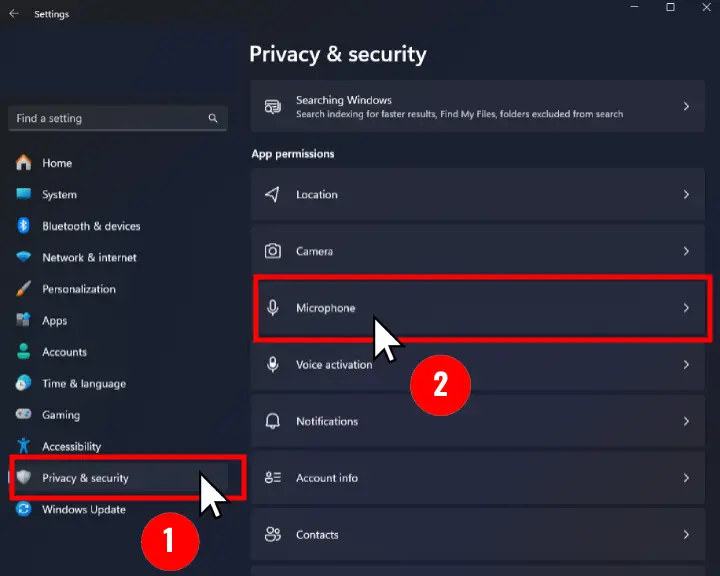
In the left pane, click “Privacy & security”
Then, scroll down to locate “Microphone.”
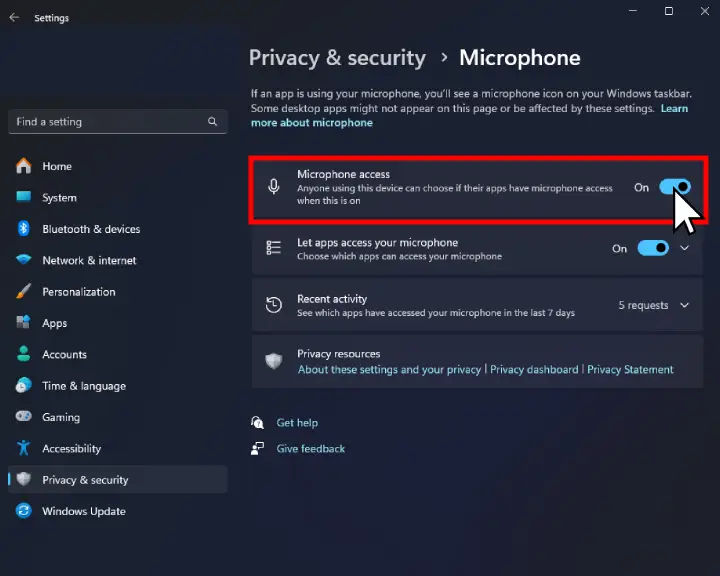
Verify your “Microphone Access” is “ON”
If not, click on the toggle on the right side.
If the Microphone Access was disabled, then this is why you can’t use the voice chat in Valorant, now, when your machine can use your microphone, open Valorant and test your communication.
3. Set Your Mic as “Default” Device
To use your microphone while playing Valorant on Windows, you need to make sure that you specify which is your default microphone.
For instance, if you have more than one microphone connected to your PC, your system may attempt to use the incorrect microphone. This will ultimately prevent you from using the Valorant voice chat, so it’s essential to specify your preferred microphone.
Here’s how to set your microphone as “default device” on Windows:
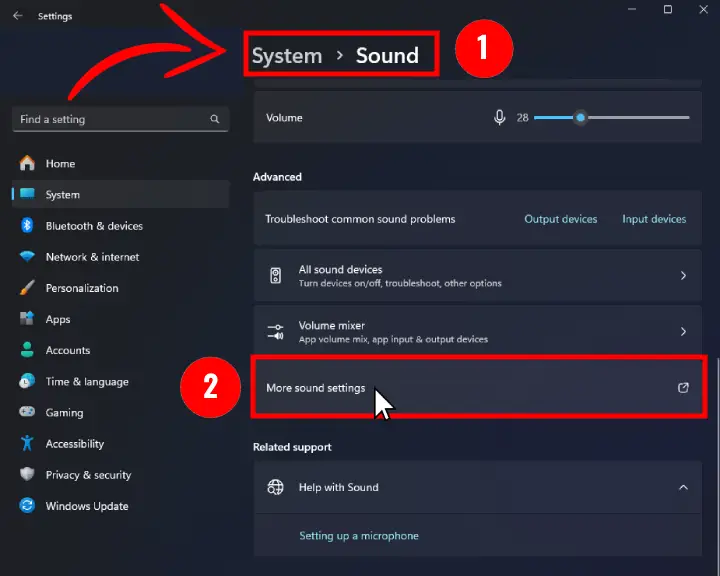
First, click on the Start Menu and go to “Settings.”
Go to System → Sound → More Sound Options.
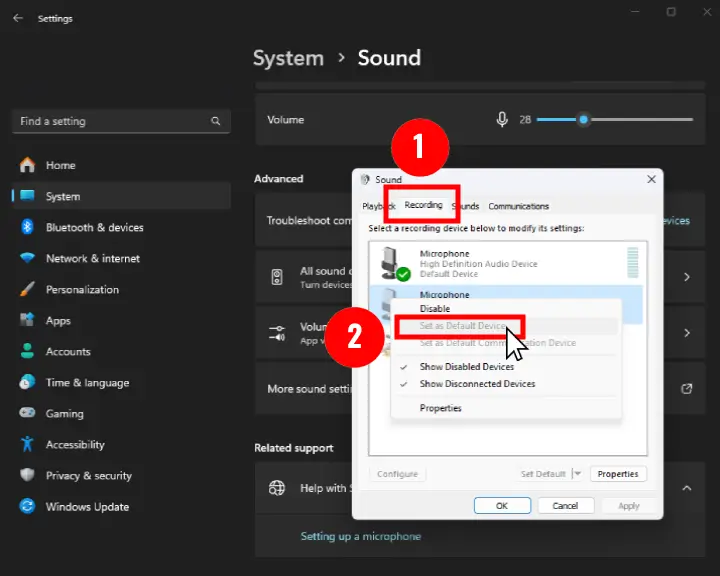
Then, click on the “Recording” section in the prompt.
Right-click the preferred and connected microphone.
Select “Set as Default Device” and exit the settings.
When ready, open Valorant and test whether the microphone is working. If not, you need more troubleshooting, so let’s continue reading…
4. Correct Valorant Voice Chat Settings
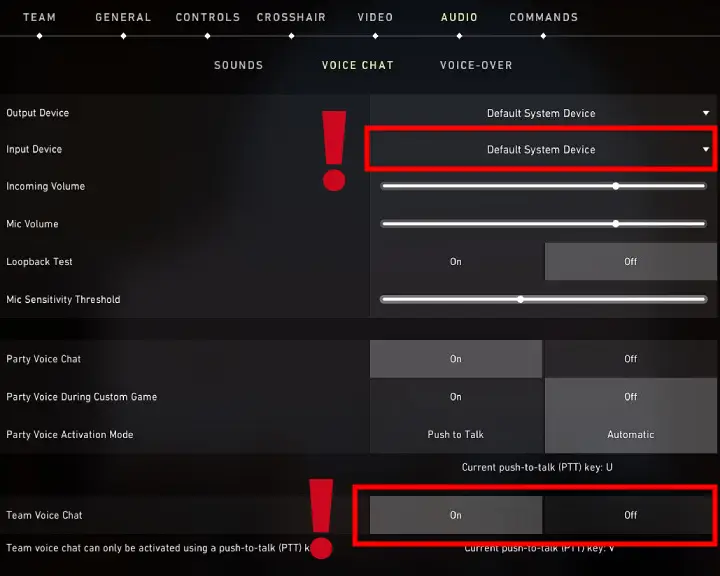
If your Valorant microphone is not working, there are quite a few essential settings in the voice chat options of the game. Some concerns are your input device, mic volume, sensitivity, and whether the Team Voice Chat is enabled.
Go ahead and open the Valorant Settings → Audio → Voice Chat to reveal the options and set them accordingly.
Recommended Valorant Voice Chat Settings
Output Device
Default System Device
Input Device
Default System Device
Incoming Volume
75%
Mic Volume
75%
Loopback Test
OFF
Mic Sensitivity Threshold
45%
Party Voice Chat
ON
Party Voice
(During Custom Game)
OFF
Party Voice
(Activation Mode)
Automatic
Team Voice Chat
ON
The most important setting to pay attention to is the “Input Device,” which is recommended to be the Windows’s default microphone. You must also verify that the “Team Voice Chat” option is set to “ON” for you to be able to communicate with teammates.
Tip: After configuring the Valorant’s voice chat settings, restart the game!
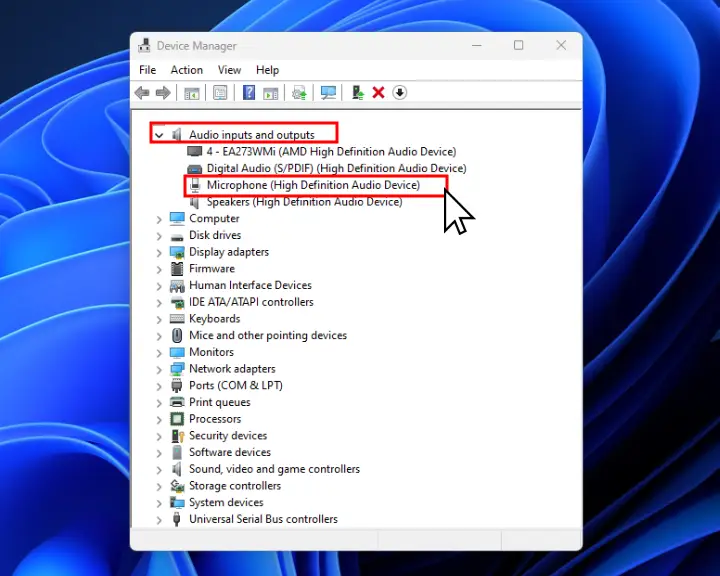
5. Update the Microphone Drivers
Likely, your Valorant mic is not working because your drivers are outdated, so we will show you a quick way to update them. The steps below are applicable for Windows 10 and 11, so go ahead and update your microphone drivers to resolve the Valoran voice chat problem.
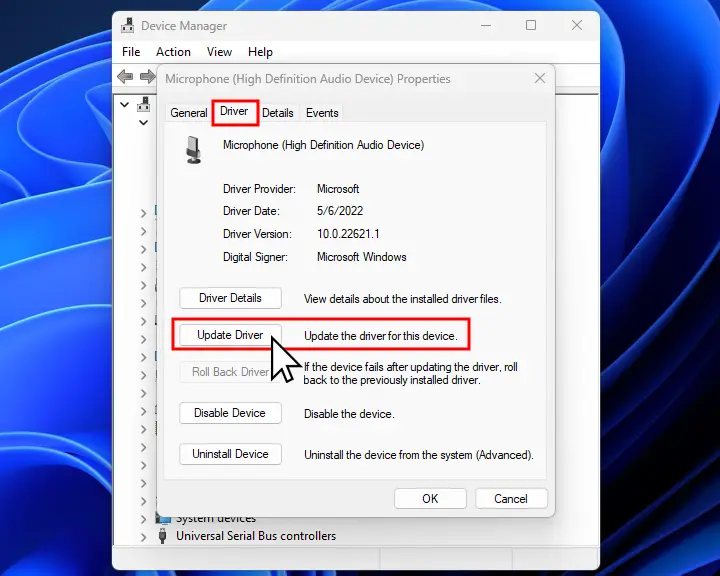
Here’s how to update audio drivers on Windows computers:
When the prompt opens, click on the “Drivers” tab.
Finally, select “Update Driver” to start the process
When your system updates the microphone driver, we recommend rebooting your gaming machine and checking whether you can use the voice chat. If your issue continues, keep reading ahead…
6. Unintall & Reinstall Valorant
The next step is to perform a clean Valorant reinstallation, which means removing the game from your Windows machine entirely. This will clear any data corruption, replace missing files, and hopefully solve your microphone issue.
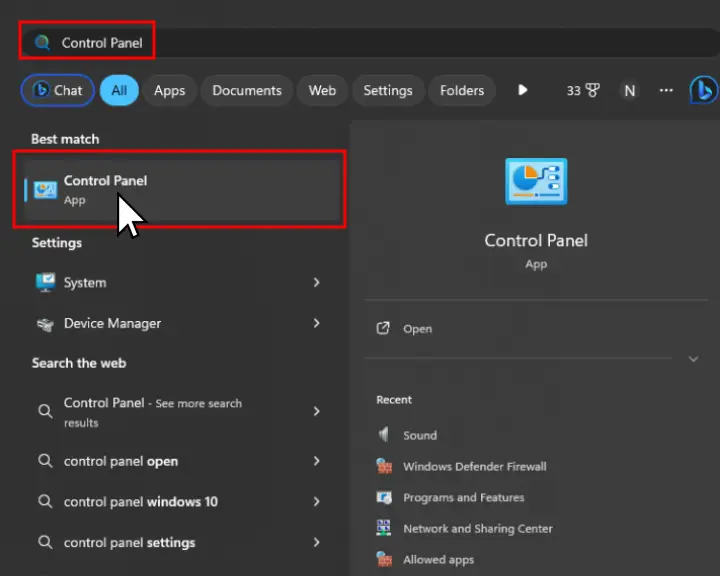
Here’s how to reinstall Valorant step by step:
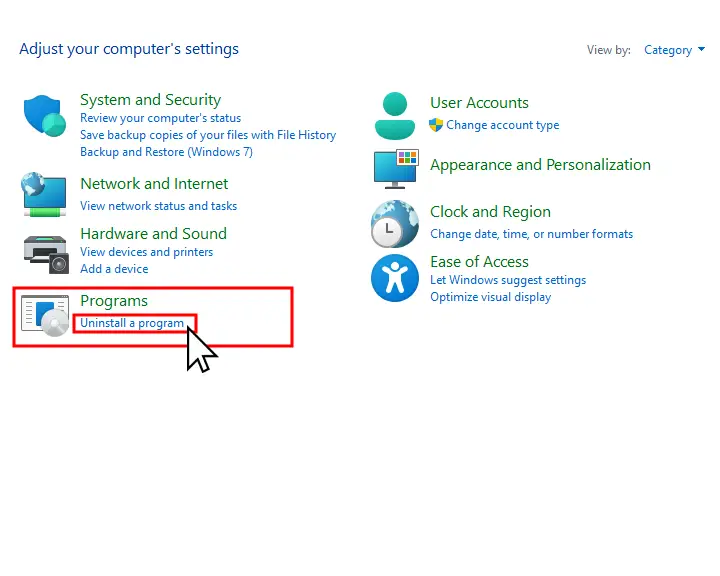
Click the Start Menu, and open the Control Panel.
In the Control Panel, click on “Uninstall a Program.
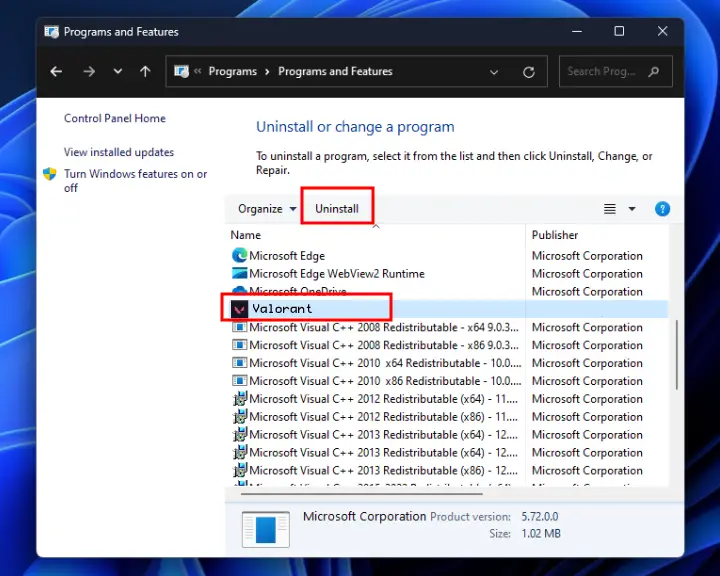
Find Valorant from the list of all installed programs.
Highlight the game and click “Uninstall” to remove it.
To reinstall the game, open the Riot Client and download Valorant from scratch. You can jump into Valorant and test whether your microphone and voice chat works when ready.
Warning: Reinstalling Valorant will reset all in-game settings to default.
Valoring Mic Not Working - Additional Fixes
If you’ve tried all the essential steps, you should know that sometimes your Valorant mic is not working due to external factors rather than a setting issue. So, we’ve prepared some steps that were proven to help when the Valorant microphone is not working.
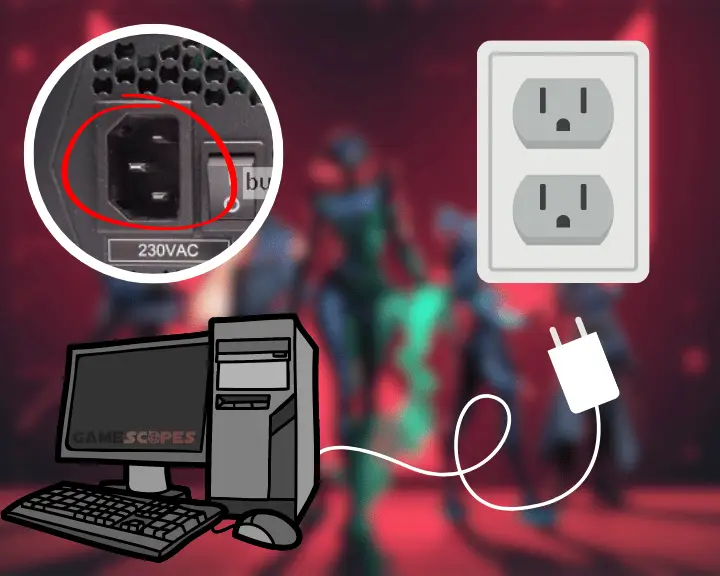
#1 Power Cycle Your Gaming Computer:
If your Valorant microphone is not working out of a sudden, your Windows has likely developed a bug/glitch that is affecting your input. A simple system restart can solve the issue in a matter of minutes, so go ahead and reboot your computer.
#2 Unplug and Replug your Microphone:
Sometimes, the issue with your Valorant microphone comes from your microphone’s AUX or USB connection. So, replug your microphone, and if this doesn’t work, switch to a different USB or AUX port (if available) on your machine.
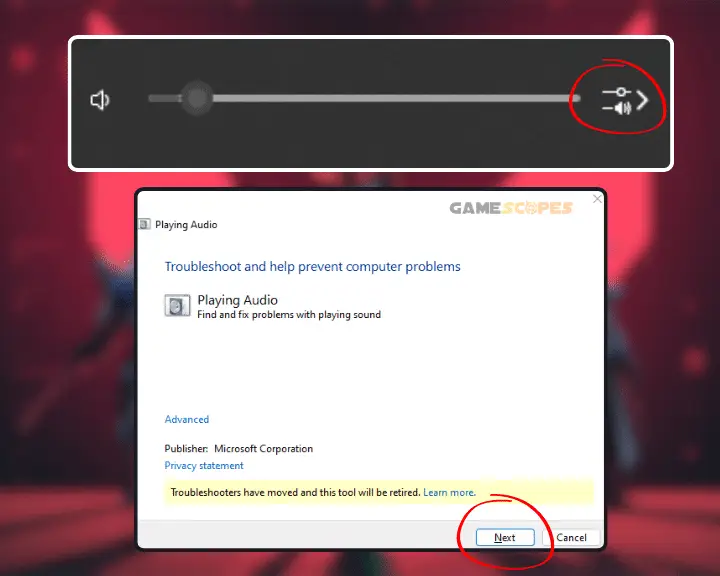
#3 Troubleshoot Sound Problems
If you didn’t know, Windows has a dedicated troubleshooter tool that can automatically diagnose issues with your microphone. You only need to right-click the “Speakers” option on the right side of the Windows Taskbar and select “Troubleshoot Sound Problems.”
Let's Recap - Why Valorant Mic Not Working?
Hence, your Valorant mic is not working because the sensitivity is too low, the microphone access is not allowed, or the voice chat settings are misconfigured. The solution is to address all these things and implement optimizations such as driver updates, game reinstallation, and microphone tests.
Hey there, fellow gamers! I'm the wordsmith behind GameScopes.com with near a dacade of experience in games and troublehsooting gaming devices. I am here to share my true passion and help everyone in the gaming industry.